Many Paypal users often get stuck around the question How to Verify Paypal Account? If you are also one of those, just get yourself ready! In this article, I’ll tell you everything you need to know about Paypal account verification.
Paypal is one of the prominent online money transaction systems. And millions of Freelancers, bloggers, and online marketers rely on Paypal for receiving their payment across the world.
But unfortunately, Paypal offers limited features for the none-verified users. If we want to uplift those limitations, we need to verify our account on Paypal. The primary limitation is with the money withdrawal and sending.
Yes, the account we create on Paypal is initially limited. And we need to verify it, to get the advantage of the full features of a Paypal account. But before we move further to learn the steps on how to verify PayPal Account, let’s figure out the benefits of PayPal account verification.
Table of Contents
Benefits of PayPal Account Verification:
Below are some of the benefits that you get, once you verify your PayPal account.
- With verified Paypal account, you can send as many PayPal payments as you want. There won’t be any limits anymore.
- In the verified Paypal account, the process to withdraw money becomes seamless. And all the limitation are lifted afterward.
- After verifying your PayPal account, the money you receive on your account will automatically be deposited to your bank account.
- In verified Paypal account, you can quickly deposit money even to your debit card or credit card when making payments
- Verified status increases the confidence and trust among the PayPal community and even outside of PayPal.
Now that you have understood, why PayPal verification so important, let’s move further. And check out, how to get verified on PayPal. PayPal accounts can be verified through different ways.
In this article, I’ll be telling you everything about PayPal confirm identity. So stay tuned till the last, and you will get your Paypal verified. And certainly, you will never ask again, “how do I verify my PayPal account.” Let’s get started!
How to Verify Paypal Account:
Before we move further to learn the steps on how to verify Paypal, let me tell you what Paypal account verification is.
Meaning of Paypal Account Verification:
I’ve added this section to the tutorial because many people don’t exactly get the meaning of account verification. So here I’m with the definition of Paypal account verification.
Unlike Twitter or Facebook, Paypal account verification doesn’t mean adding the verification check sign on the account. Instead, Paypal account verification means adding your bank account details, PAN card number and Purpose code to your Paypal account.
After adding the bank account details, you need to verify it following the prescribed process. For this, your account will get credited with two small amounts. And you need to add those amounts to your PayPal account, in order to get verified.
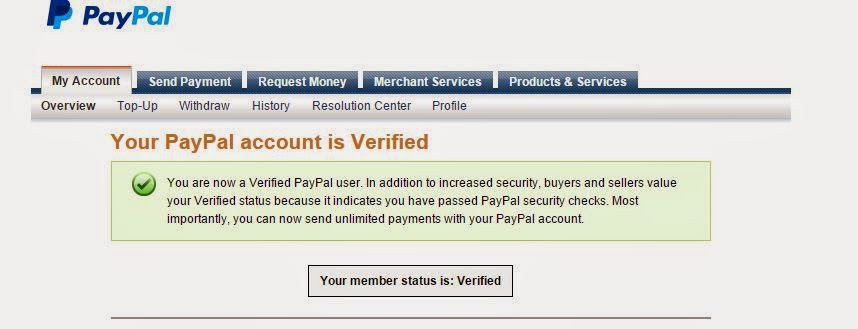
Once the account is verified, you will see the following success message.
With unverified Paypal account, you can shop online by using your credit or debit card. But to receive limitless Payments through Paypal, one needs to verify it. Steps for the same are given below.
How to Verify Paypal Account:
If you have landed on this page to learn how to verify PayPal, it’s pretty apparent that you have already created a Paypal account. If you haven’t yet created Paypal account, do that now. The process to do that hardly takes more than a few minutes.
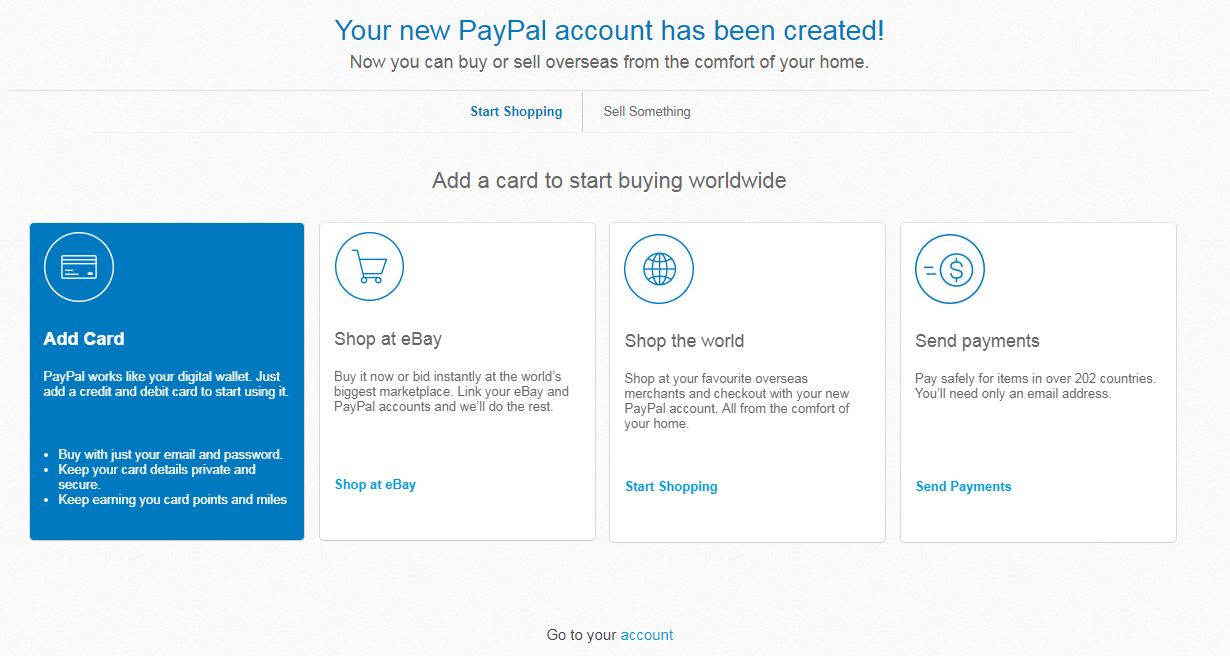
All you need to do is just go to PayPal.com. Click on Sign up and enter your details. Once you have completed the process, you will see the following screen.
Now just click the go to your Account. And the process of account verification begins. Now follow the below step by step process.
Step 1. Once you go to your PayPal account for the first time, you will see the following screen.
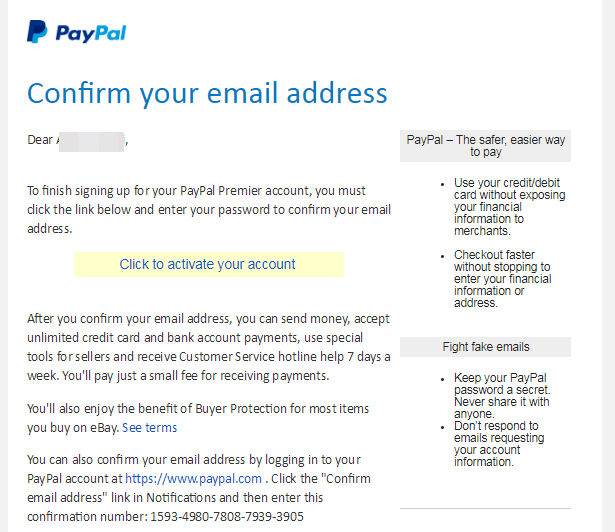
Step 2. After finishing the account signup process, you need to verify your email address, then only, your account sign up process will be considered complete. So, for that, head over to your email account.
There, you will see an email from PayPal for verifying your email address. Just click the given link and confirm your email address.
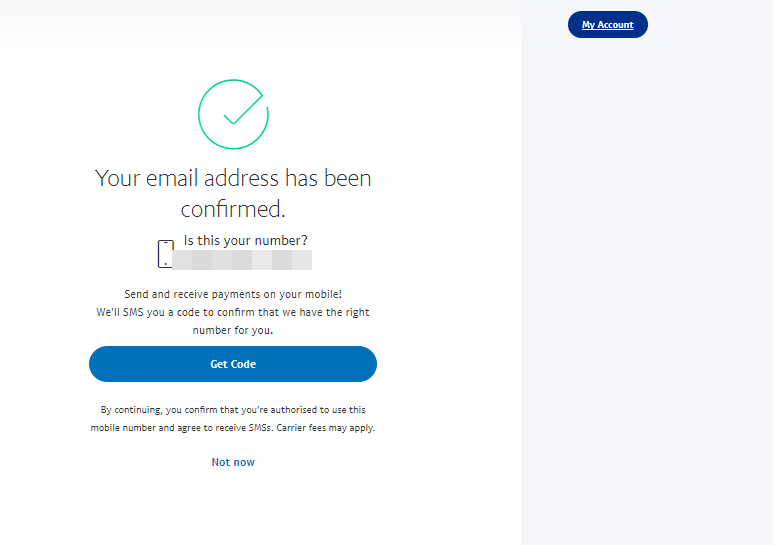
Once you do that, you will see a success message saying, Your email address has been confirmed!
Step 3. In the next step, you need to verify your mobile number. However, verifying the mobile number is not mandatory. But after confirming your mobile number, you can send and receive payments even on your mobile. And your account will be more secure than before. So, here’s how to confirm your mobile number.
As you can see in the above screenshot, there is a mobile number given, which I need to confirm. It’s the same mobile number which I entered while signing up for the Paypal.
So, to confirm your mobile number, click on the Get Code button. On doing that, you will receive a code on your mobile. Now enter that code in the confirmation field on the screen. And click the validate button.
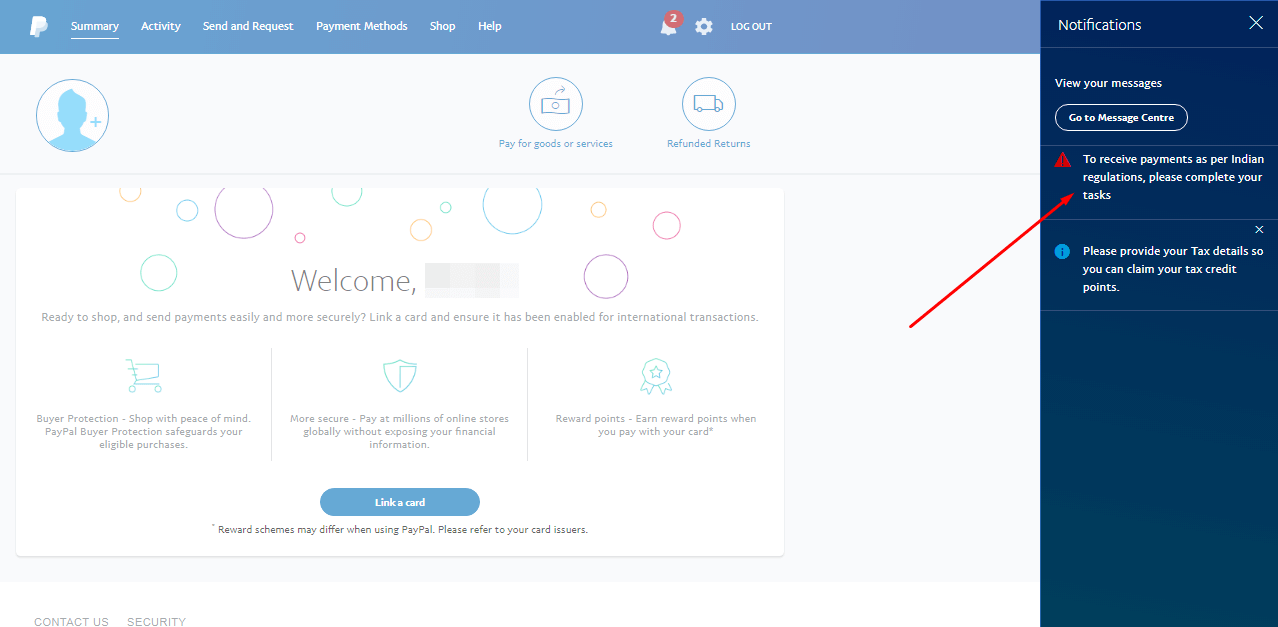
Step 4. Ok, now go back to your account’s homepage. And click the first link in the notification area. It’s the option, where we need to verify all our information including bank account, personal information, etc.
I’ve highlighted the option in the below screenshot. So just click that option to move further.
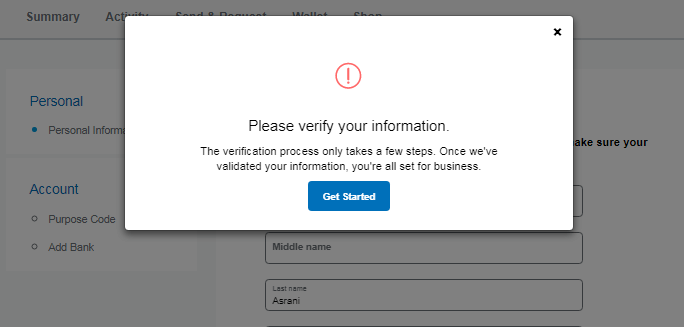
Step 5. Now, in the next option, you will encounter a pop-up window. Here, you need to click the Get Started button to begin the verification process. The screenshot of this step is given below. Just click on the Get started button.
Step 6. So, now we have reached to the very important section, where the actual verification process begins. After this point, the verification process is of three steps. The first step is to Add the personal information. The second step is to Add the Purpose code. And the third step includes adding a bank account.
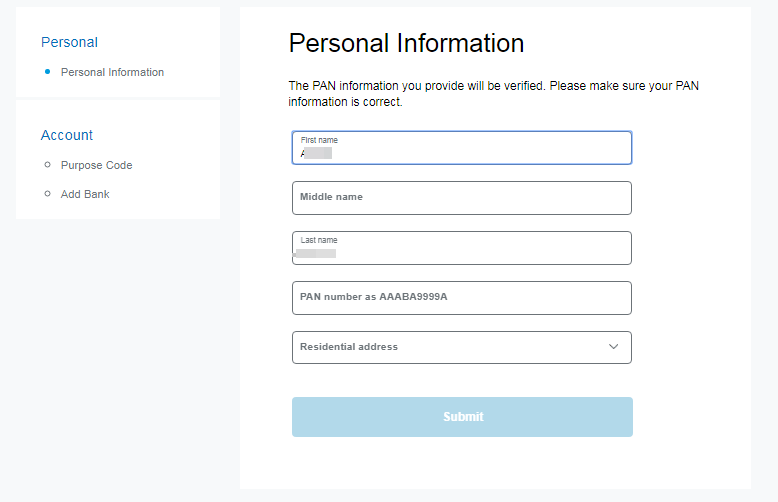
So it’s the first step, where you need to verify your details. The details include your first name, middle name (if any), and your last name, PAN Card number, and your residential address. See the below screenshot.
Remember, the name and address you enter must match your details on the PAN card because Paypal verifies your PAN information. If they don’t match with each other, your status for personal information verification won’t be confirmed. And it will remain pending until you provide the correct information.
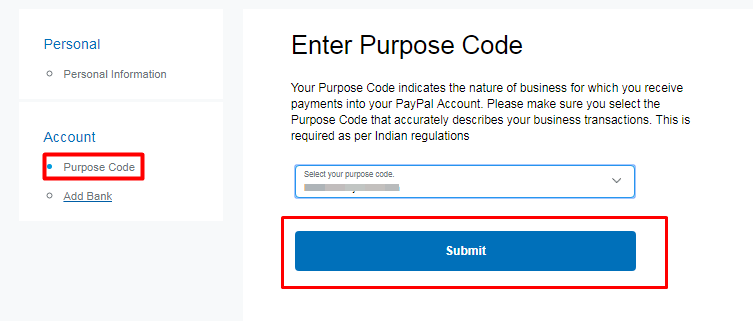
Step 7. Once you are done filling your personal information, it’s time to move forward. In this step, you need to provide the Purpose code. Purpose code depicts the reason for which you want to receive payments into your PayPal Account.
So, choose the reason out of the drop-down list which best describes the nature of your business. The purpose code you select will be applicable in all your transactions by default. But you can change it for individual transactions if you wish to.
Once the purpose code is selected, click the Submit button. And move to the next step.
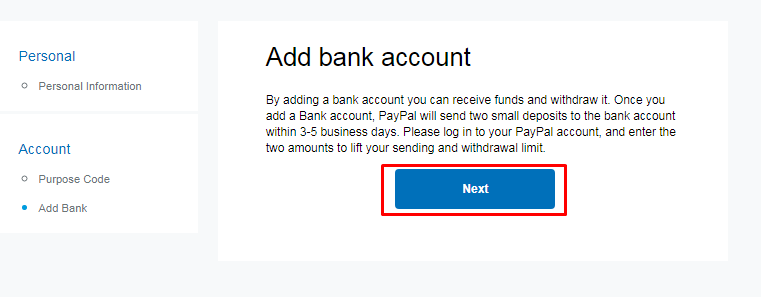
Step 8. Now we are almost done. And one last, yet the most crucial step is left, i.e., adding the bank account details and bank verification. This steps can take up to 2-3 business days to be completed.
As I’ve already mentioned, after adding your bank account details, you can quickly receive funds and withdraw the money to your bank account. To proceed, click Next.
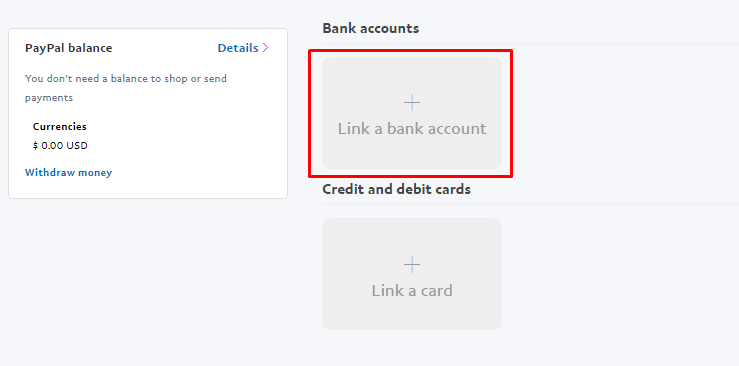
Step 9. In the next step, you need to click on the first option i.e. Link a Bank account.
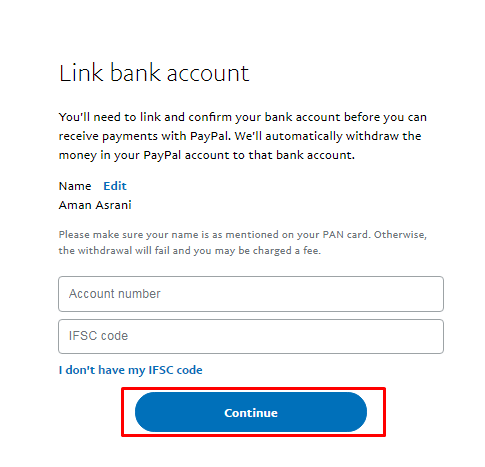
Step 10. In the given fields, you need to enter your Bank account number and IFSC code respectively. If you don’t know the IFSC code of your bank, you can check it on your passbook. Or you can also search on google.
Else, you can also click on the I don’t have my IFSC code. Once all the details are filled, click on the Continue button.
After confirming the details, you will receive two small deposits into your bank account within 4-6 business days. Once the deposits are credited to your account, you need to login back to your PayPal account. Then go to profile. And click Confirm the bank account.
There, enter the amount you received and Confirm. By doing that, your Paypal account will be verified. So that’s how to verify PayPal!
Now one last step, which I would recommend you to follow is to add your credit or debit card to your Paypal account. This step is also important to follow. Because without that, you won’t be able to make payments via your Paypal account.
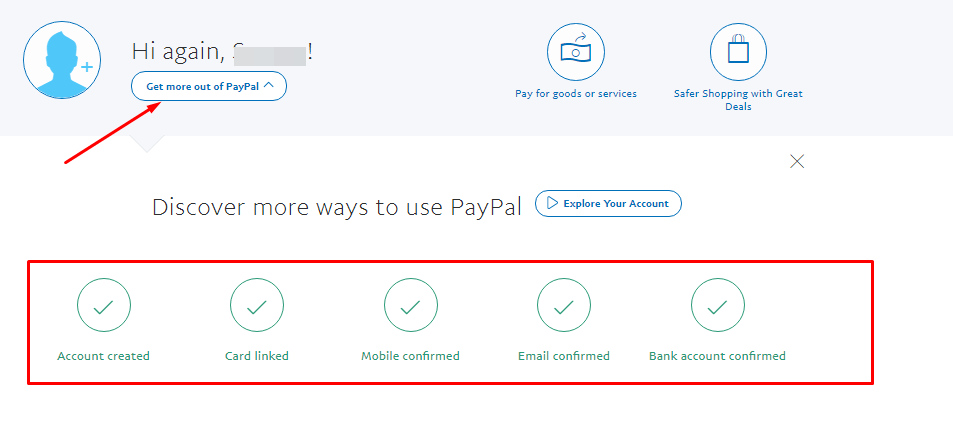
See the below screenshot of my account. I’ve completed all the steps and my account is full-fledged active Paypal account.
So, that’s it for how to verify Paypal Account. And it’s time to wrap it up.
Hand Picked Stuff For You:
- How to Delete PayPal Account
- Best PayPal Alternatives
- How to Send a PayPal Invoice & Request Money
- How to Cancel Recurring Payments PayPal
Conclusion:
So I guess now you have understood, that Paypal account verification does play a major role. And it’s a mandatory process, that needs to be followed if you have to go along with Paypal.
There are several alternatives to Paypal account verification with a bank account. But personally, I like to go with the genuine way. Because, if we follow the genuine process of account verification, we won’t get troubled in any way.
The transactions with verified PayPal account are secure, hassle-free and limitless.
There is a considerable difference between the benefits of a verified and a non-verified PayPal account. PayPal account verification proves you an authentic and a real person. And you become a trustable person for online transactions.
Lots of websites don’t even accept the unverified PayPal accounts for sending and receiving Payments. And in this comprehensive article, I’ve given you all the details that one needs to know about Paypal account verification. And I’m pretty sure that you have got all the details properly.
But in case, if you have any doubts or queries remaining, you can ask that in the comment section below. And I’ll try my best to get back to you as soon as possible.
Also, do let me know if the article was useful to you? And consider sharing it, if you find it worthy!
