Want to know how to use Grammarly to write error-free articles?
Oh, it sucks!! Seeing a reader complaining about your poor grammar skills, that too through a comment really hurts!
Can you relate to this situation? Then, you should use the ultimate grammar checker tool, Grammarly. If you are a blogger for a while now, I hope you heard this name already. With Grammarly, you can eradicate every damn typo and grammar mistakes that you are unaware of.
I have been using the premium version of this tool for six months now. So, it’s time for you to enjoy error-free writing with this amazing tool. Don’t worry!! You will get a free version, but with limited features.
Table of Contents
Introducing Grammarly
Grammarly is available in different forms (software, Microsoft Add-on and a chrome extension). But I found the chrome extension to be the most useful and easy to use.
To be frank, Grammar is not everyone’s cup of tea as there are some weird rules exist in English grammar. As a result, I have seen some grammar checker tools suggest awkwardly without any pinch of common sense (I know it’s a program though). But you will not face such problems with Grammarly. It’s the most intelligent Grammar checking tools out there; I would say.
Before giving you an insight on how to use Grammarly, I want to show some of its features.
Features of Grammarly
1). Different Versions to Use
Grammarly is versatile. That means you can use it in different forms as I already said. If you prefer MS Word to write content, downloading and installing Grammarly add-on solves the writing issues you have. And, you are the one who likes to enter content directly into the post editor of your blog, the Chrome extension (now you can use Grammarly on Firefox too) comes your rescue.
Is a desktop utility your pick? Grammarly’s software edition can solve your dilemma here. In fact, it is available in three different versions.
2). Brilliant Proofreading
Grammarly does not work like a bot that never knows the context of your content. But it works intelligently by understanding what you mean by your words. If Grammarly finds the excessive use of any word in your content, it will suggest some alternative words for you.
This intelligent tool makes sure that your piece of content agrees almost 250 rules in English grammar including subject-verb agreement, dangling modifier, comma splices, etc.
3). Plagiarism Checker
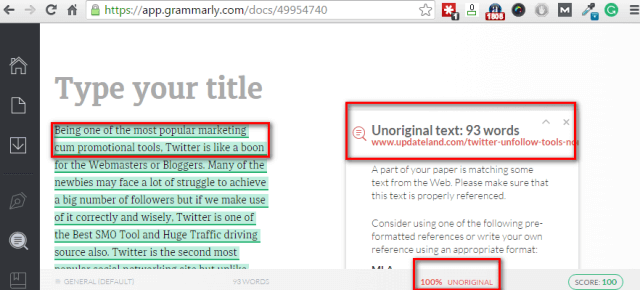
With a single subscription of Grammarly, you are not getting a proofreader only. Instead, you will get access to a brilliant plagiarism checker also. This feature can be turned off from the left sidebar of the Grammarly editor. Just like it shows Grammar mistakes, it is possible to see plagiarism issues with a link to the source, which matches your content.
4). Write anywhere on the Web
I already mentioned about this feature. Grammarly does not limit you to type your content in a specific place to check for errors. With suitable Grammarly versions, you can type anywhere and get the suggestions without sweating. Your FB Status Boxes, Mailbox and comment forms are under the control of Grammarly so that you can come up with error-free sentences.
Don’t think these are the only features. Many more unique specifications are there using which becoming a talented writer is easy.
I think we can move on to the real meat of this article, that’s how to use Grammarly.
How to Use Grammarly?
As I already told, there are three versions. So I have divided this tutorial into three to explain the method for each. Don’t think it’s a Herculean task to reduce errors in content with Grammarly. You will be amazed to see how easy the process is.
Let’s get started with the browser extension.
How to Use Grammarly Browser Extension?
Grammarly is known as the extension for Google Chrome users. But you can follow the same method to download Firefox add-on also.
Step 1: The very first step is, downloading the Grammarly extension. Visit grammarly.com to find the download. Don’t worry about your browser. The website will automatically detect it and make you download the apt version.
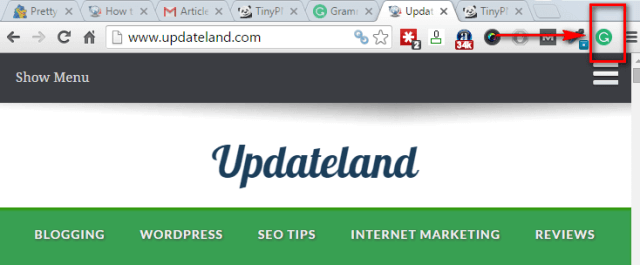
Step 2: After the installation, you can see the green Grammarly icon in the toolbar section. If you can’t see it, try enabling the extension from the Settings.
Step 3: Now, you have to create a free account (If you want to purchase Premium version, you can do the upgrade process from free Grammarly version). The registration form will be displayed just after you download the extension. Provide your Name, Email, and Password and then, click Sign up. That’s all. You have created a Grammarly account.
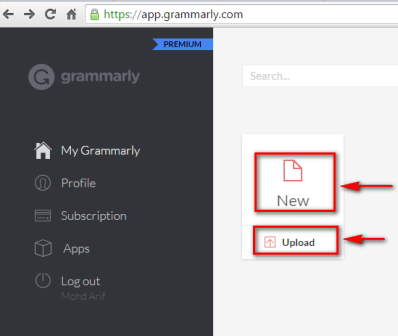
Step 4: Click on the Grammarly icon on the toolbar. If it asks you to log in, do it with the credentials you just gave when you signed up. Soon, you will be able to see a New Document link just on the window you get by clicking on the toolbar icon.
Step 5: Clicking on New Document will bring you to Grammarly editor. There, you can type or paste the content. Alternatively, an option is available in the left sidebar, which allows you to upload your Word document or text file.
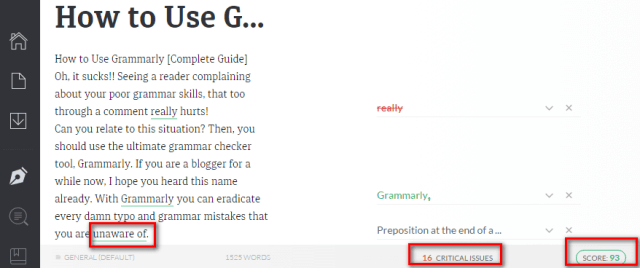
Step 6: Everything is set to check for mistakes now. The bottom bar displays your content quality with a rating and number of errors you made. Grammarly underlines every error with a green line. Clicking on it will give you details of the problem and the suggestion to make it right. Follow the suggestions consciously.
N.B .:- Browser extension checks your FB status box, email message box and also your blog’s post editor. So you can check the errors real time without uploading or pasting your content on another tab of Grammarly editor.
Don’t go with Grammarly editor blindly. Remember, it is a web app. So don’t make changes without matching your common sense with Grammarly suggestions.
How to Use Grammarly Add-on for MS Word?
Most of us use MS Word to write blog posts and articles. In this scenario, you may think we have to copy the content and paste it into the Grammarly editor for checking. Not at all! Grammarly provides an MS Word plugin with their premium account.
Proceed with the steps given below to make your MS Word sensitive to typos and grammar mistakes.
Step 1: Go to app.grammarly.com. You will see your Grammarly dashboard there. Log in to your account if you are asked for it.
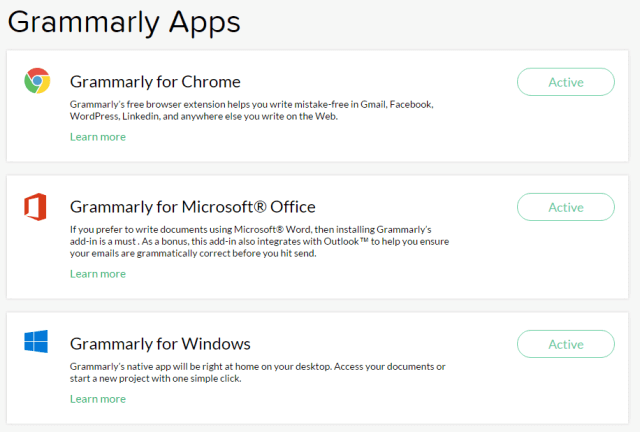
Step 2: Now, you can see your Grammarly dashboard. Look at the right sidebar and click on Apps.
Step 3: There, you can see three options, Grammarly for Chrome, Grammarly for Microsoft Office and Grammarly for Windows. Select the second one. At once, the download process will be begun.
Step 4: Open your downloads folder and launch the setup for the add-in. Follow the instructions you see.
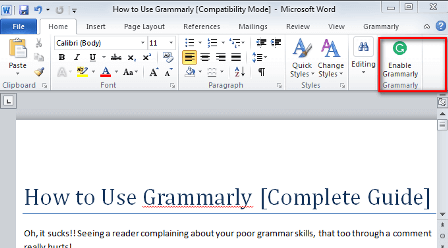
That’s all. Open MS Word now. You can see a dedicated Grammarly screen on the right of the window. Remember, you can’t make use of Undo command or shortcut with Grammarly enabled.
The mistakes will be shown on the right portion, from where it can also be solved.
How to Use Grammarly Software
Here it is, a dedicated Grammarly software to provide an amazing proofreading experience. If you don’t like the add-on or extension, this software can very well serve the purpose. Follow the steps given below to install and use the Grammarly software.
Step 1: Follow the steps 1 and 2 from the above section. It will bring you to the App page of Grammarly.
Step 2: Click on Grammarly for Windows from there. You will see a download is started.
Step 3: Open that setup file you have downloaded. It will install the Grammarly software on your Windows machine.
Hurray!! You have just installed Grammarly software on your PC. As you read, it’s not a Herculean task. Go back to your desktop to launch the software through the shortcut there.
You will see an interface exactly similar to that you saw on Chrome extension. Copy your content or upload a word file to keep on checking for the mistakes. The software version has every feature that the web version has.
Don’t think this will work perfectly without being connected to the web. Every version of Grammarly (be it web version, MS add-in or software) works only when you are connected to the internet. So, make sure you have a functional connection.
Don’t You Know How to Use Grammarly Now?
I hope I have given you a complete guide to making you aware of how Grammarly works. As I already said it has three versions. You can stick with anyone you like. For me, I found the web version is suitable to use for its universal nature (check everywhere). That being said, the Word add-in is somewhat slow on my PC.
If you new to hear about this tool, you can go with the free version and find out how it reduces your mistakes. Then, purchase the premium and be an exhilarated writer.
You may also like: Grammarly Review 2022- Is This Grammar Checker Worth It?


Hi Jyoti,
Great review on Grammarly. I wrote a review a while back but I believe you have given way more of a detailed review than I did; Good job.
I still use it but using the free version which seems to work okay for me.
Hey mate,
Grammarly is really an amazing tool to eradicate most of the typo and grammatical errors. I was also awarded by Grammarly premium subscription for three times.
I can say one thing for sure, no any other grammar checker tool is efficient compared to Grammarly. I give it full marks.
Well, Jyoti!!! You covered almost each of the aspect of Grammarly. I love this article.
-Nikhil
Thanks for the guide but I personally like ginger tool, its very easy to me.
Hi Jyoti,
Thank you for sharing such a nice Article…!!
Grammarly is no doubt a great tool and a must have tool for all of the people who want to make a good presence over internet. I have been using this for a while now and it has proved to be a life saver for me. I am using this as Chrome extension and it’s helping me a lot in lot of ways.
You know, I came to know about this tool when I was just browsing your blog almost two weeks ago and I loved it
Thank you for sharing such a valuable article. keep doing such nice work
Thanks,
Vikash Sharma
An ultimate review for one of the great content proofing tool. It’s an eye opener for bloggers who are still struggling to work with MS Word and some quick vocabulary lookup tools. I’m going to give Grammarly a try and hoping for the best results. I would conclude by congratulating you for bringing up such an important guide to help bloggers.