This is an EngageBay tutorial explaining step-by-step how to use most, if not all the features the tool offers.
Imagine you’ve never used EngageBay. You’ve never used any similar tool or platform. You’ve 0 experience.
Even then, this EngageBay tutorial will seem like a 5th grade textbook to you. To make that happen, I signed up for a new, fresh account. So I can explain things to you as you see them on a fresh, new account, from step 1.
EngageBay takes care of everything, from generating leads (marketing), converting leads (sales) to nurturing those leads (service). In fact, those 3 are the exact modules it offers in addition to a “Livechat” module being available.
So, in this EngageBay tutorial, you’ll learn how to use EngageBay and hopefully skyrocket your brand.
Here’s everything you’ll learn in this piece:
- User-Interface
- How to install EngageBay on your website?
- How to add contacts/emails manually?
- How to create e-mail templates on EngageBay?
- How to create broadcasts using EngageBay?
- How to create forms using EngageBay?
- How to create landing pages with EngageBay?
- How to create “Unsubscribe forms” using EngageBay?
- How to add goals for yourself or your teammates?
- How to change SEO settings for EngageBay landing pages?
- How to create E-mail sequences using EngageBay?
- EngageBay tutorial: Automation
- How to create deals using EngageBay?
- Steps to create tasks using EngageBay.
- How to create appointment scheduler using EngageBay?
- How to use EngageBay livechat module?
- How to add shortcuts on EngageBay?
Table of Contents
- User-Interface
- Marketing Module
- Adding contacts/emails manually
- How to create forms using EngageBay?
- How to create landing pages with EngageBay?
- How to create “Unsubscribe forms” using EngageBay?
- How to add goals for yourself or your teammates?
- How to create E-mail sequences using EngageBay?
- EngageBay tutorial: Automation
- Engagebay Sales modules
- How to create deals using EngageBay?
- Creating proposals using EngageBay
- Creating tasks using EngageBay
- How to create Appointment Scheduler using EngageBay?
- How to use EngageBay livechat module?
- How to add chat shortcuts on EngageBay?
- EngageBay Tutorial- Final words
User-Interface
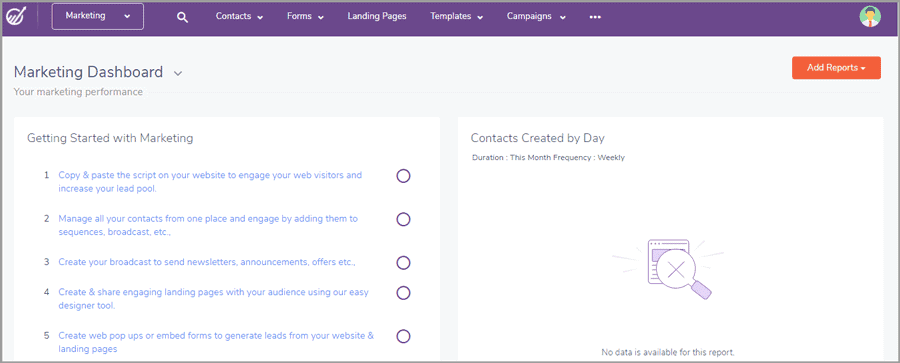
Once you login to your account, this is what you’ll see:
On the left, a task-list is visible. You only need to complete these tasks.
“How”? Simply click on any of the tasks. EngageBay will take you to the relevant page where you can complete the task.
The top-bar is equally easy to understand. It lets you access the various features on the platform. You can design landing pages, create templates (both for e-mails and videos), manage campaigns and a lot more (discussed in detail later).
Point being, you can use EngageBay even if you’ve never used anything similar before.
Marketing Module
As mentioned earlier, EngageBay has 4 primary modules. Let’s walk you through the “Marketing” module first? This also is the default module, this is where you land when you first log in.
Installing EngageBay on my website
The first thing we need to do is install EngageBay, right?
So, to start, the first task you see is a simple copy-paste job!
I click on the task, and it gives me the code I’ve to paste on my website.
(If you’re using WordPress, paste the code on your Footer.php file).
Done!
Once you do that, EngageBay detects the code on your site and displays a blue tick next to the task on the list. This denotes that you’ve placed the code right.
Adding contacts/emails manually
I’m covering this here because it’ll make explaining this EngageBay tutorial easier. This basically is the list of people you’ll contact using EngageBay.
Now, the simpler option here is to let it be auto updated. That’s possible when users fill in your forms, landing pages etc. All of this can be created using EngageBay and I’ve covered the steps in the later sections.
However, when starting, you won’t have a list on your day 1. So, let’s create one manually (in case you have e-mail IDs from a previous campaign).
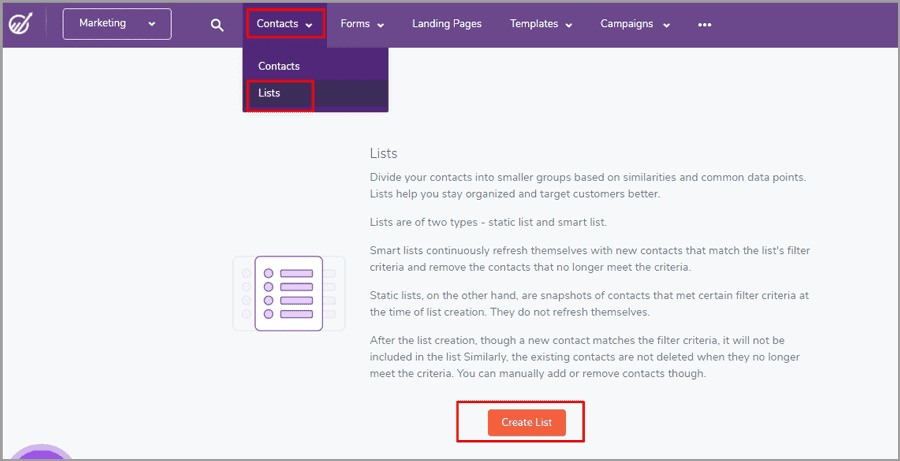
Go to Contacts > lists > create list.
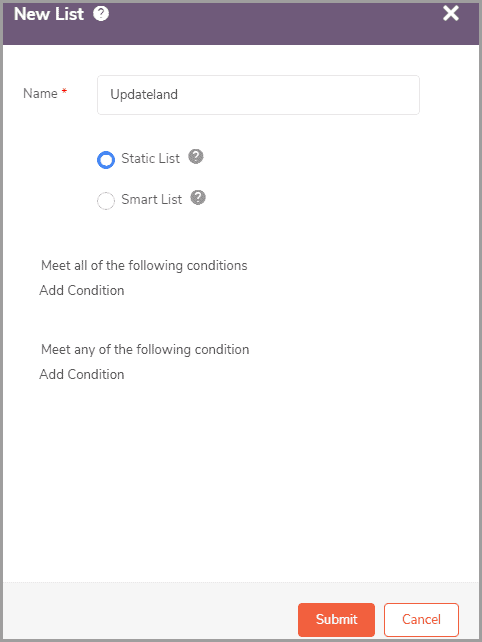
Now, you can create:
- Either a “Static” list.
- Or a “Smart” list.
Let’s just say that you can set “filters” for your lists. The smart list updates itself when a new contact matches said filters set by you. The static list doesn’t update itself.
For now, simply select the smart list option if you’re confused.
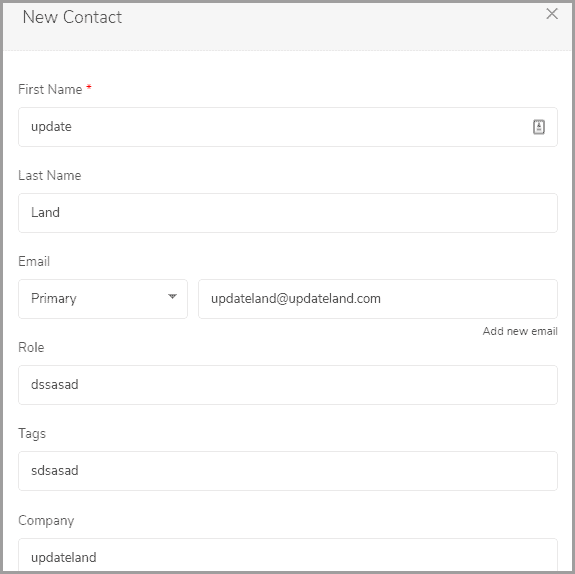
On the next page, click “create contact”.
You’ll get a form. You can fill in the name, e-mail, tags, company, website, phone number etc. for this contact.
Done! You just created your first EngageBay contact.
Importing existing contact lists to EngageBay
Obviously EngageBay allows list imports. This is useful when you already have a list and do not wish to enter each contact’s data manually.
Simply go to Contacts > Import.
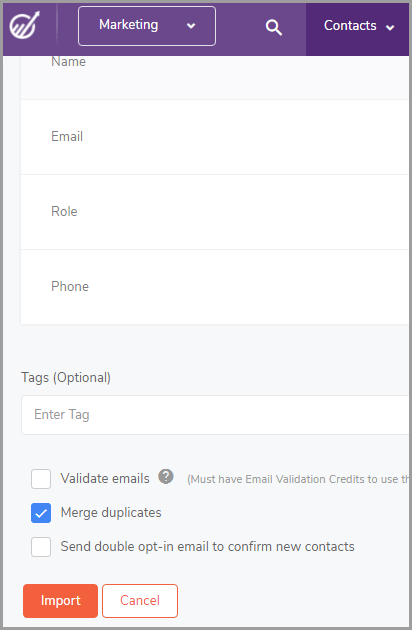
Next you simply choose your .csv file and upload it. You can upload as many as 25000 contacts per upload.
On the next page, just click “Import”. (You can play with the options on the page, however, that’s optional. I’m keeping this EngageBay tutorial barebones so you save time).
Easy, wasn’t it?
How to Create e-mail templates on EngageBay?
EngageBay offers a plethora of pre-designed, professional e-mail templates. Imagine you’ve 0 design experience, or knowledge about conversion-optimized email templates. Well, EngageBay is just for you. I say that I’ve been there and that’s how it was for me.
Again, I’m covering this now because it’s something we’ll use in the next section. Note that this is optional. You can totally skip this now and proceed to the next section directly.
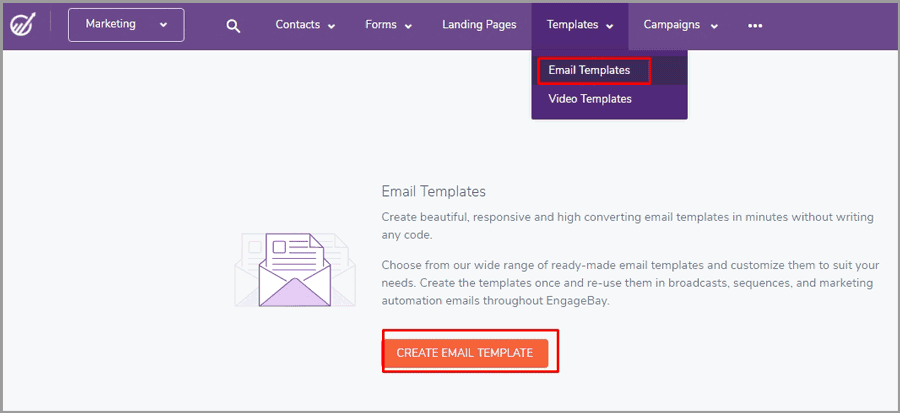
So, I’ll go to Templates> Email Templates to create my first e-mail template.
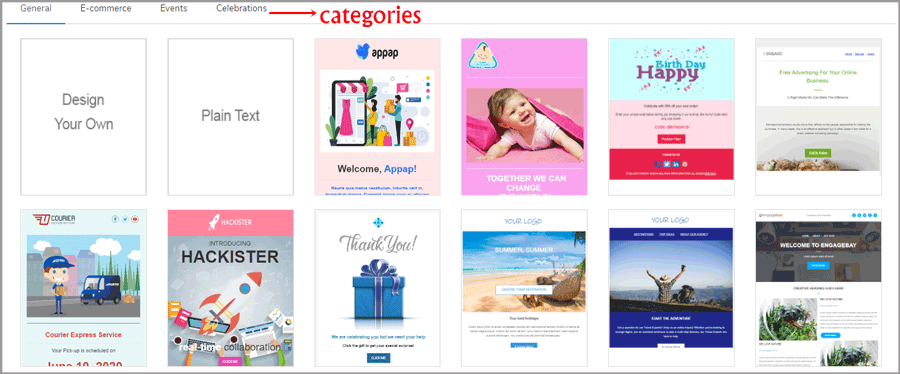
Now I need to choose a template to work with. If you notice the top-bar in the screenshot below, it has categories. You can go with:
- General
- E-com
- Events
- And Celebrations.
Simply choose one which suits your purpose, industry and taste best.
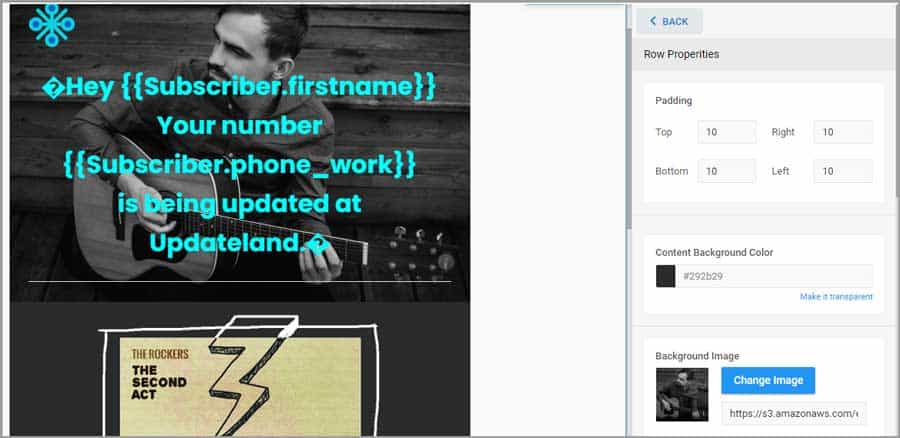
The editor is completely drag & drop! No “coding” or ninja skills required.
You only need to change the text, images, add your own elements and done! Obviously you can also personalize these templates so they’ll appear custom-crafted for each recipient.
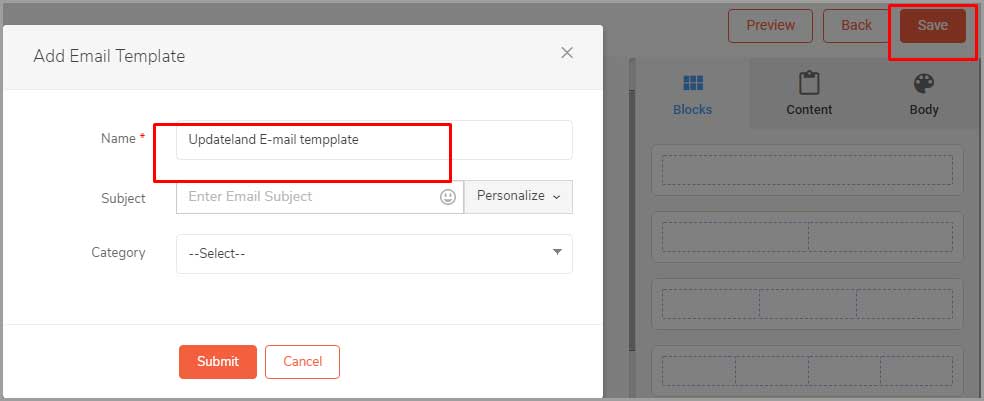
Next click “save” on the top-right corner, and enter a name for the template and click “submit”.
Done!
Now that you’ve got some contacts to work with, and an e-mail template, let’s actually start using EngageBay?
How to create broadcasts using Engagebay?
One of the EngageBay superpowers is its “Broadcasting” abilities.
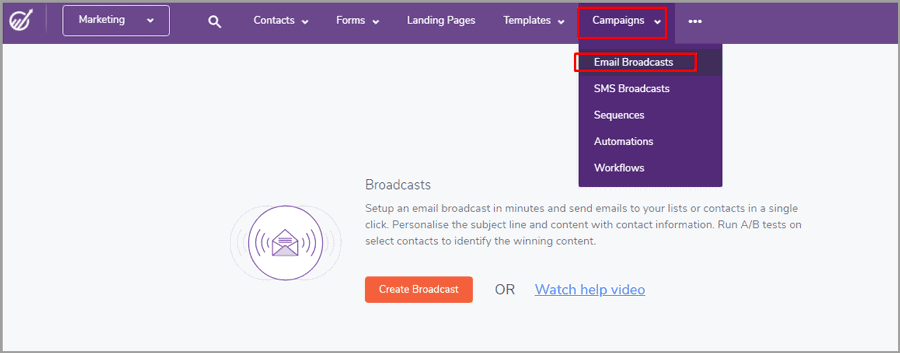
To do that, I clicked on my next displayed task. You can also access the screen from the top-bar > campaigns > email broadcasts. Click on the “create broadcast” button as shown below.
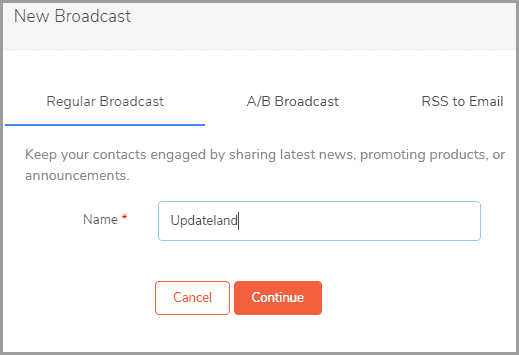
Next enter a name for your broadcast.
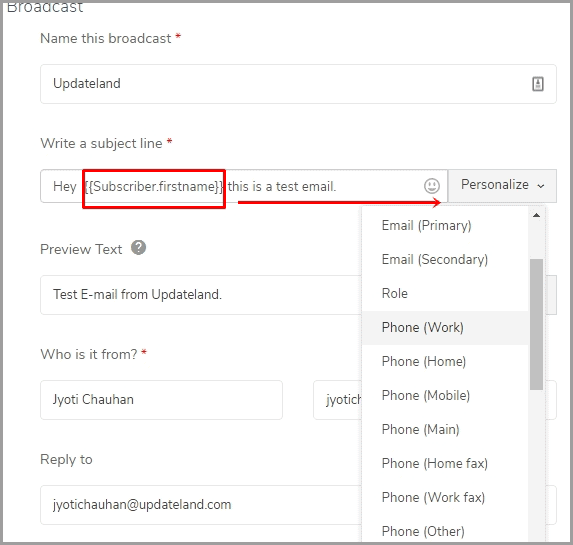
The next page is fairly simple. Enter a subject line, preview text, your name and e-mail ID.
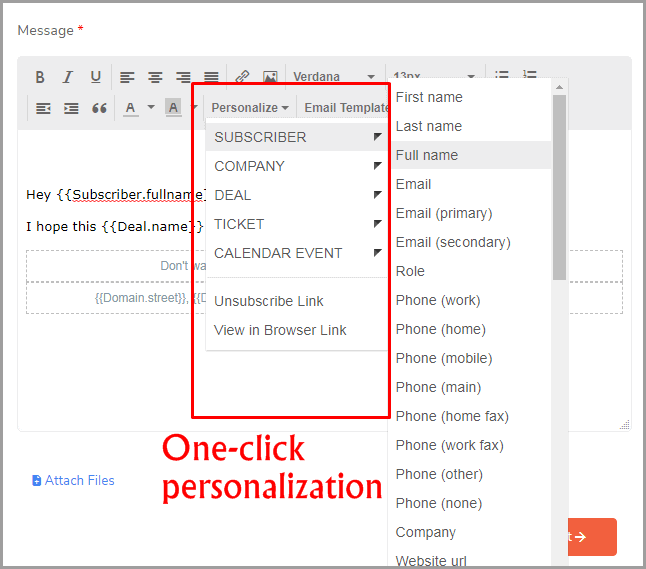
You can click on the “Personalize” drop-down menu as shown in the screenshot. This lets you insert personalization even for the subject line!
On the next page, you’ll be asked for your contact list. Choose the contact list you’d like to send this e-mail broadcast to.
Secondly, click on “Choose a template” if you wish to use the template we created earlier. You can also click on “Plain text” if you want a simple, text-based e-mail without any fancy graphics or texts.
For this EngageBay tutorial, I’m going with plaintext for now (as I’ve already explained how the builder works, haven’t I?).
So next I’ll craft my e-mail. It’s pretty simple actually. I just enter my content, personalize it using those easy placeholders and done.
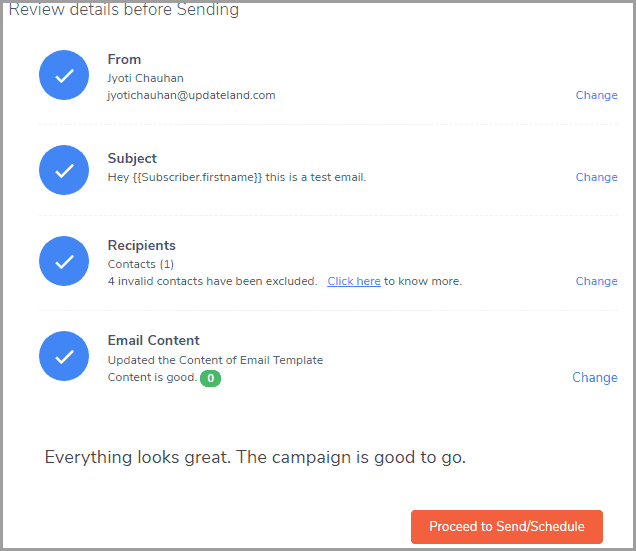
For the final step, EngageBay displays a checklist. This lets me review if I’ve missed important elements. Anyway, I can now click on the “Proceed to send/schedule” button.
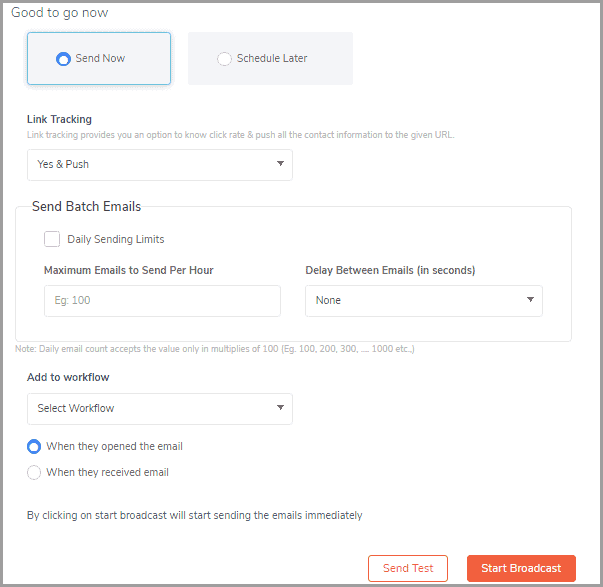
Finally, I’m on the sending page. I can choose to either send it right away, or schedule it for a later time.
I can also enable link tracking, or set batch sending limits. Basically, play with these as you wish and click on “Start broadcast”.
I personally love the amount of data EngageBay throws at me for each broadcast. It shows me:
- No. of recipients
- No. of delivered emails
- No. of opens
- The open rate
- Total clicks
- CTR
- And unsubscribers!
How to create forms using EngageBay?
EngageBay allows me to create forms. I can embed these forms on my website, landing pages and other places. The impressive part is, it takes seconds, literally!
Visitors can fill in the form resulting in leads, who can then later potentially be converted into paying customers.
EngageBay lets me create:
- Inline forms
- And Popup forms.
Creating inline forms
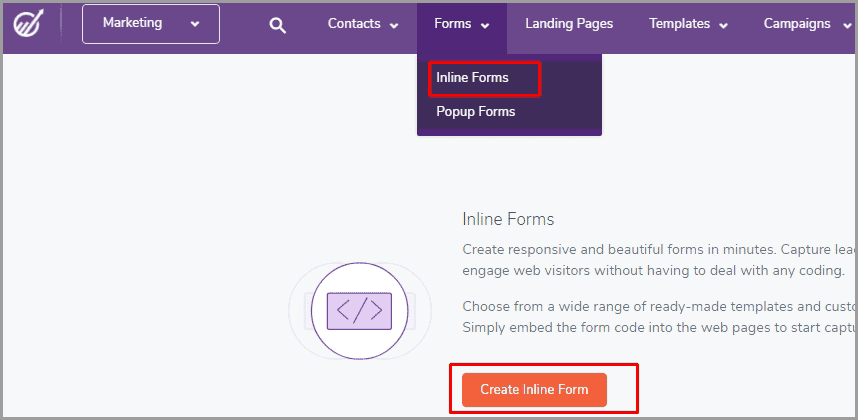
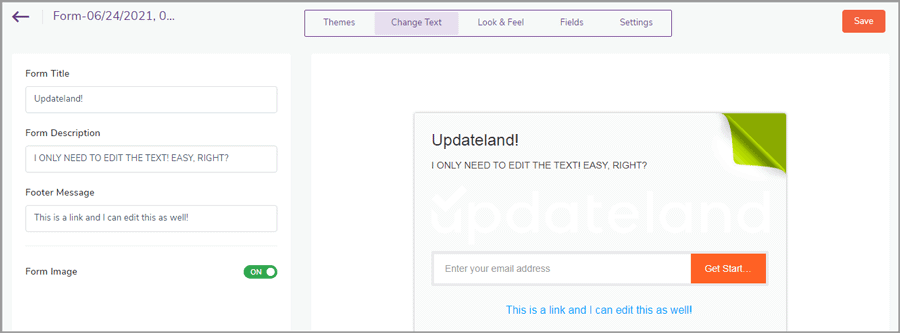
Go to Forms> inline forms from the top-bar and click “create inline forms”.
Choose from one of the many pre-designed templates.
Simply edit the text, links and images to fit your brand and purpose.
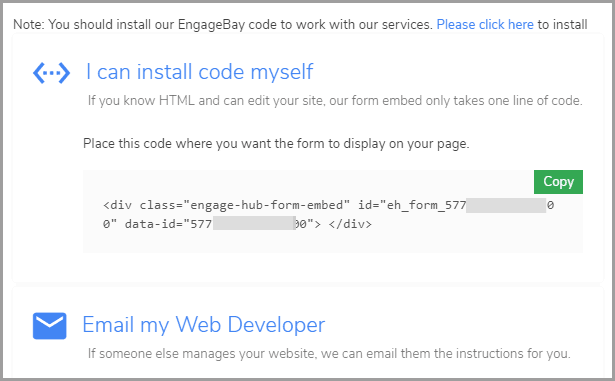
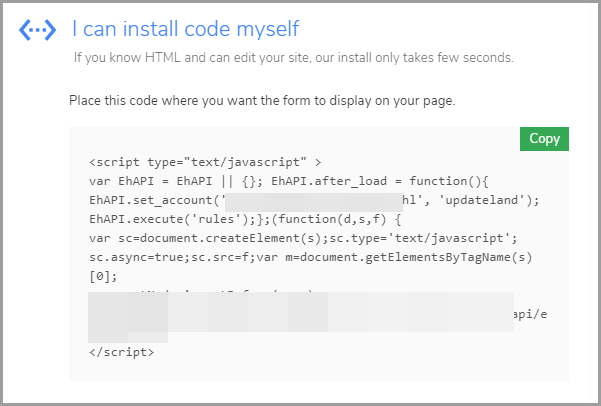
And finally, paste the displayed code on your website/landing page!
Being very honest, even for the slowest worker in your team, this wouldn’t take more than 5 minutes at best!
Creating popup forms
The process is almost identical to creating inline forms. However, just to deliver on my promise of this EngageBay tutorial being detailed, let’s walk you through the steps.
Go to forms > popup forms from the top-bar. You can then choose one of the 4 different types of form positioning:
- Popup
- Notification bar
- Bottom left
- Or Bottom-right.
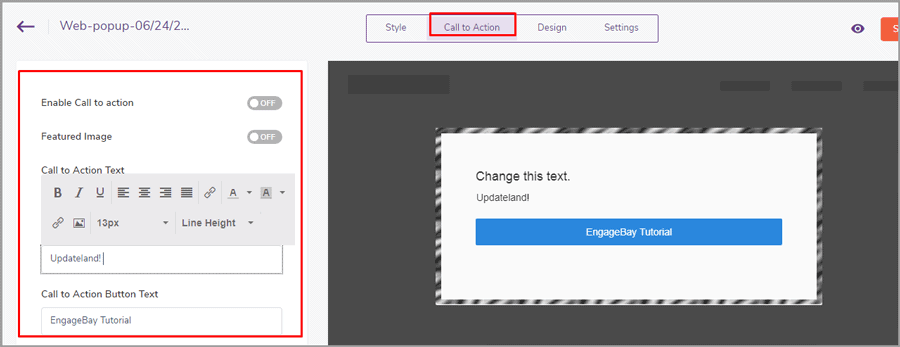
Click on the “call to action” button to customize your CTA button.
It’s as easy as changing a few lines on the screen!
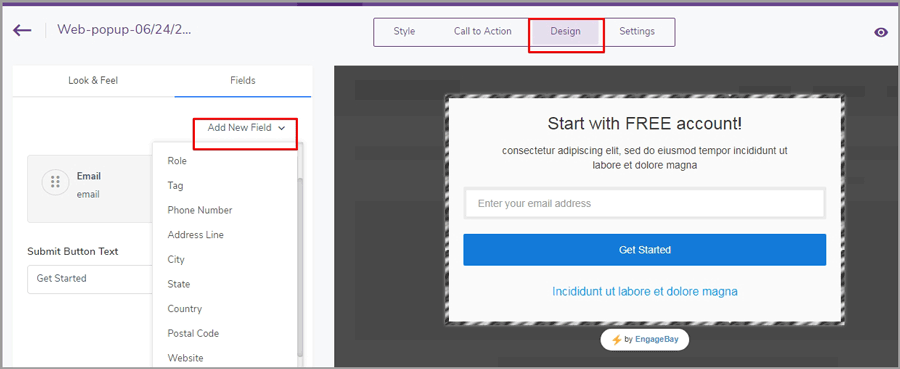
Next go to the “design” tab and drag a few elements to your liking. You can add new fields as well as such as name, address, website etc. Even elements such as radio boxes, file upload button, and hidden fields can be added!
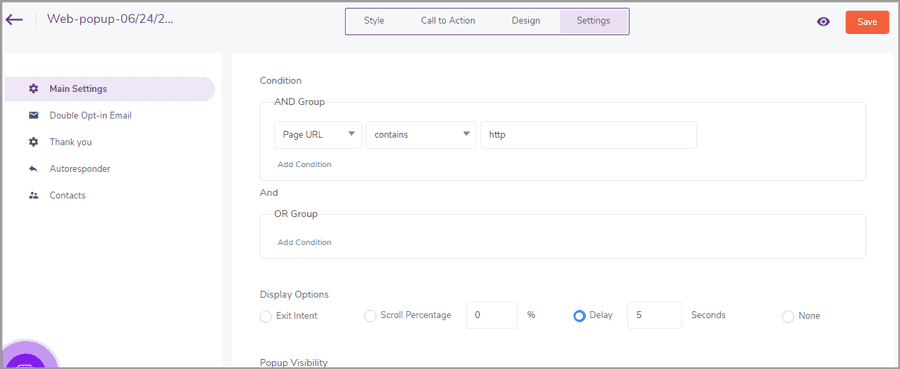
Finally go to the “Settings” tab. Here, you can:
- Set display trigger (exit intent / scroll percentage/ delay etc).
- Enable/disable visibility
- Add security measures such as recaptcha, block domains, block IPs etc.
On the same page, you can also enable double opt-ins, customize your thank you message, set your autoresponder etc. Simply navigate to the proper page using the left-sidebar and you’ll be done in seconds.
Finally, just copy the code and paste it on your page.
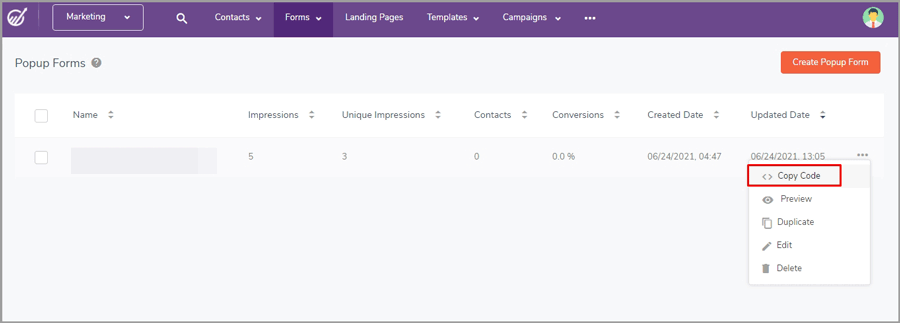
Tip: If you can’t find the code or closed the window, just go to “Forms > Popup forms > click on the three horizontal dots on your form > copy code”.
Done!
How to create landing pages with EngageBay?
After forms, the second “creative” feature on EngageBay is its landing pages. Let’s see how I create those using the tool? Again, takes minutes and no previous skills!
Click on the “Landing Pages” tab at the top-bar and then “Create Landing Page”.
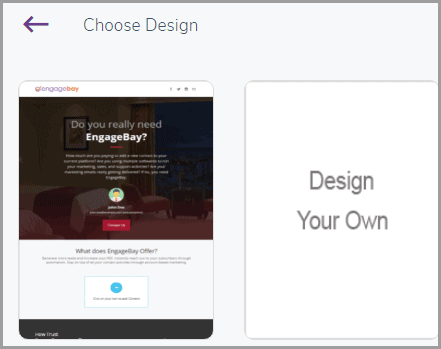
Again, EngageBay will show you dozens of templates to choose from. Make your pick.
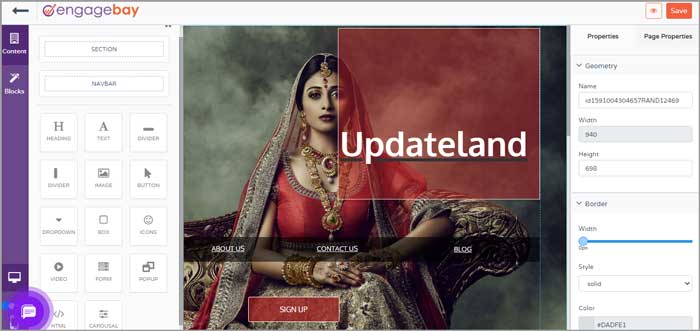
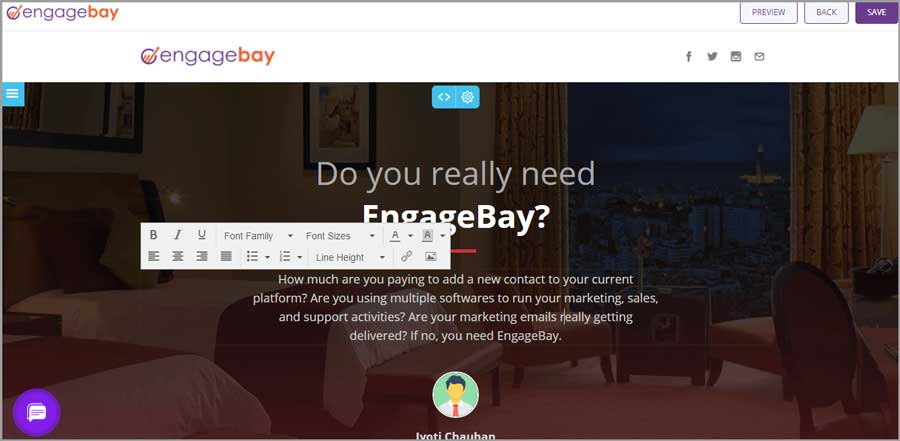
On the next page, you can design your page. It’s completely drag & drop. You can insert a variety of content including:
- Videos
- Popups
- Dropdown
- Buttons
- Forms
- Custom HTML
- Dividers
- Text (obviously)
- And a lot more.
You can easily customize the finer details. Font, style, colour, size, background or anything else can be changed mostly using sliders, or on-screen settings.
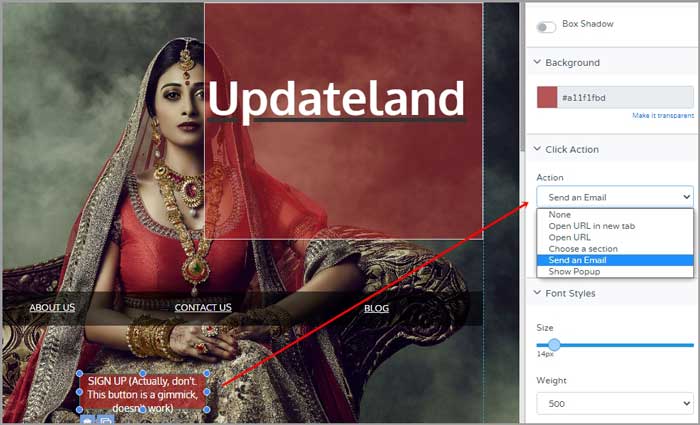
For instance, I can make a button do various things! I can redirect it to a new page, show a popup, send an e-mail to name just a few possible outcomes!
You can even set specific content to only be visible on desktop, or mobile devices. Point being, it’s not just a “design page”, a lot of advanced settings are available, and all easy to understand.
Done! Just click “Save” and you’re done with your landing page!
Just for fun- I designed this page, in “seconds” – https://updateland.eb-sites.com/EngageBayTutorial
Obviously it’s not what anyone would call “professional”, but I just want you to see the potential. Imagine if I invested minutes, or hours on it! Could really make something out of it, with “drag & drop”, easy, isn’t it?
How to create “Unsubscribe forms” using EngageBay?
This is important. With the right unsubscribe form, you can retain customers who have one foot out the door.
EngageBay allows you to learn why someone is unsubscribing! You can add “options” which they can select when unsubscribing!
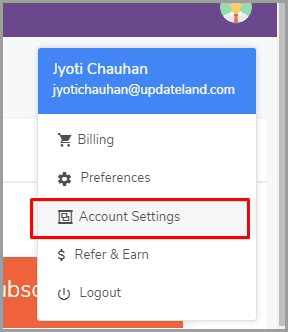
Go to your account settings. You can do that by clicking on your name from the top-right corner.
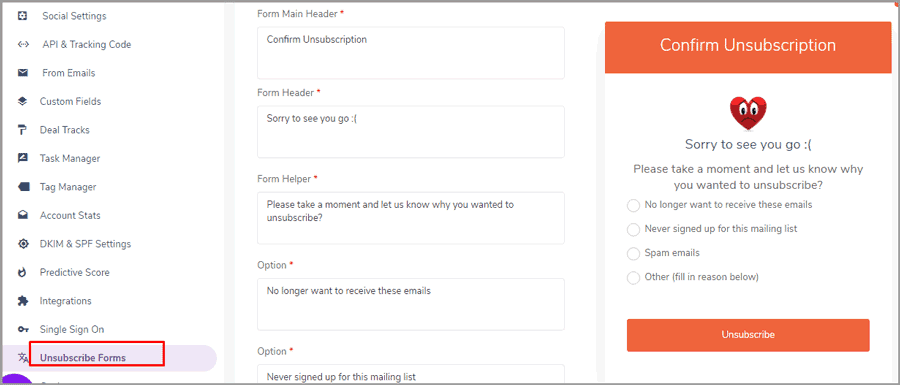
Then click on “Unsubscribe form” from the left-sidebar and make your changes to the page.
It’s really not that hard!
How to add goals for yourself or your teammates?
“The trouble with not having a goal is that you can spend your life running up and down the field and never score.” –Bill Copeland. So, let’s create goals?
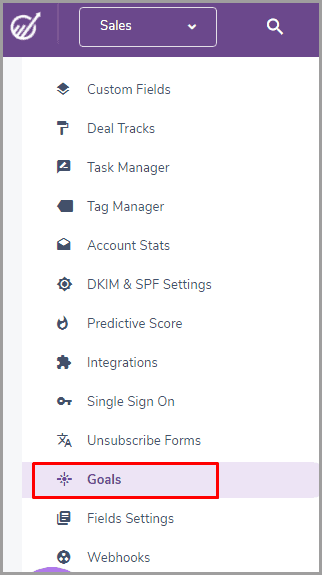
Again, go to your account settings but this time click on “Goals”.
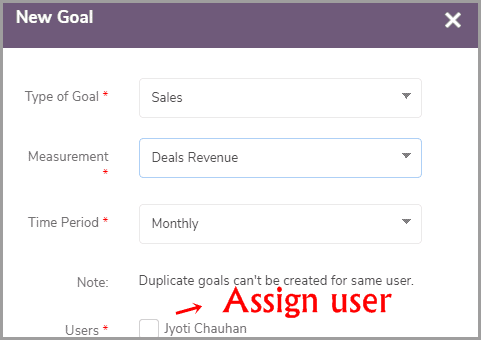
Click on “Add goal” and customize your goal. It can be a goal either for “sales” or “service”.
Furthermore, it can be either for “deal creation”, “deal revenue” or “call logs”. And then just assign a user to these goals.
Next, click on the “create goal” option next to this newly created user.
Finally, enter a goal value. In my case, I selected “Deal revenue” so I’m setting a revenue mark I expect to hit within the month.
Done! You can customize these goals as you wish, for the purposes you see fit.
How to change SEO settings for EngageBay landing pages?
I’m guessing most of you would be using paid traffic for leads. But hey, I love SEO. It’s literally my bread & butter. Fortunately, EngageBay offers decent SEO settings for its pages.
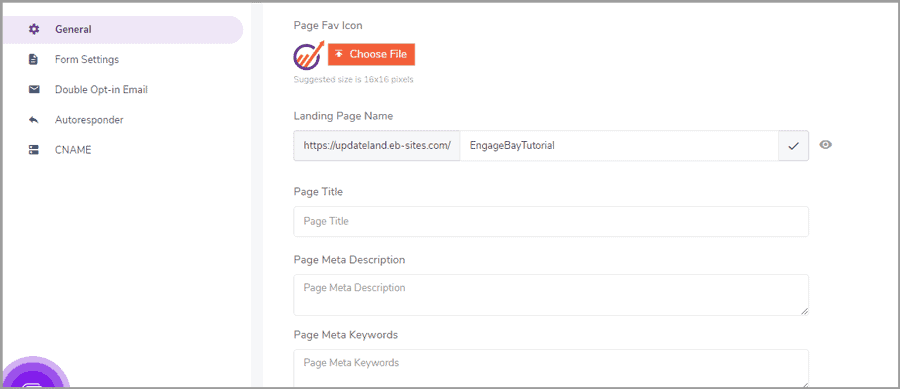
Here’s what the settings page generally looks like:
So, I can change the URL anytime I want to. As you can see, title, meta description and meta keywords too can easily be added.
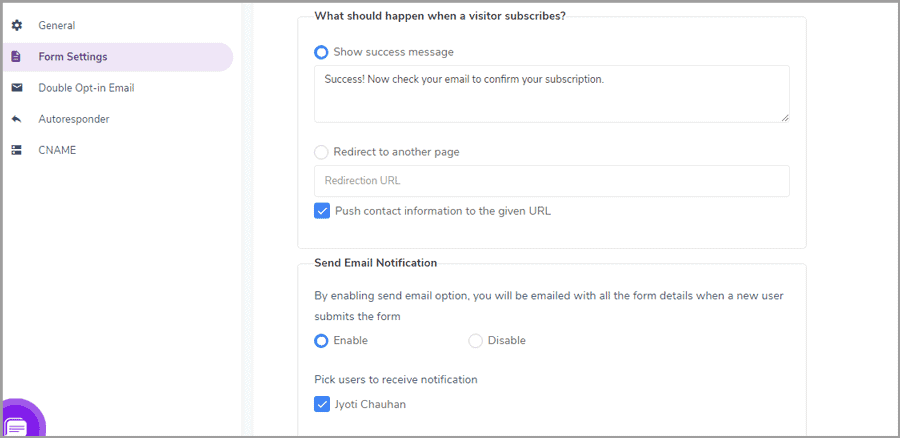
On the right, I can customize some other elements of the page. For e.g. the “form settings” lets me customize the form.
Success messages, redirections, e-mail notifications to me for new subscribers etc. can be set here. Pretty basic and simply organized, isn’t it?
Similarly, I can enable double opt-ins as well as Autoresponders. The autoresponder is just a pre-set email which gets sent to each new subscriber. More like a thank you note.
In a nutshell, EngageBay landing pages are easy as well as feature-rich.
How to create E-mail sequences using EngageBay?
A large number of people forget the brands they subscribe to. At a later time, they unsubscribe these brands because they can’t remember why they subscribed in the first place.
In other cases, even if someone subscribes and remembers you, it’s not enough for a conversion.
This is where sequence emails from EngageBay come to the rescue. These are emails you can set to be sent at specified intervals. Custom filters and triggers can be set for more specific targeting and timing as well.
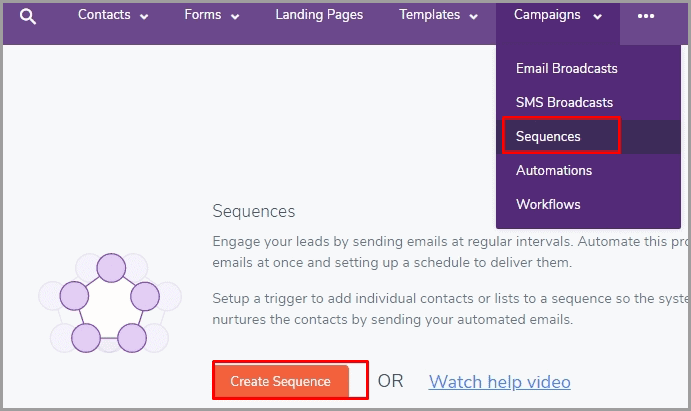
Just go to Campaigns > sequences > create sequence.
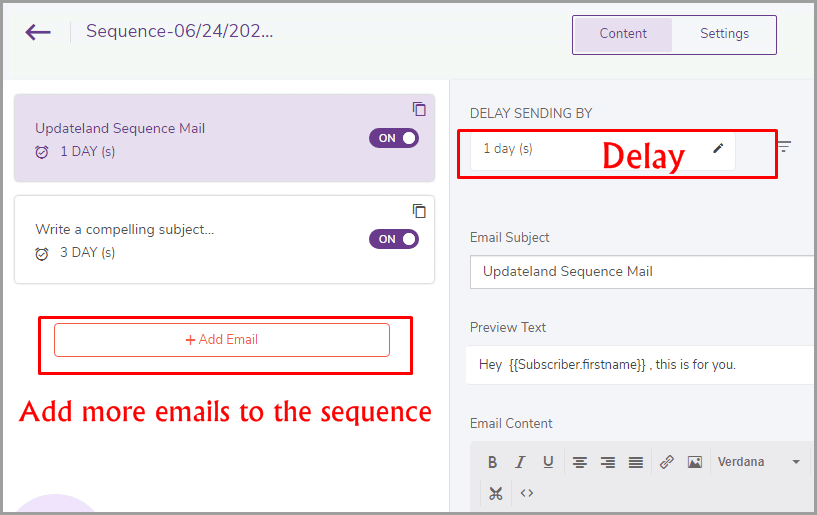
Again, setting it up is just as easy. Simply set a delay for starters. This is the number of days after which the user starts receiving these emails.
You can add more e-mails to the sequence using the “Add email” button on the left.
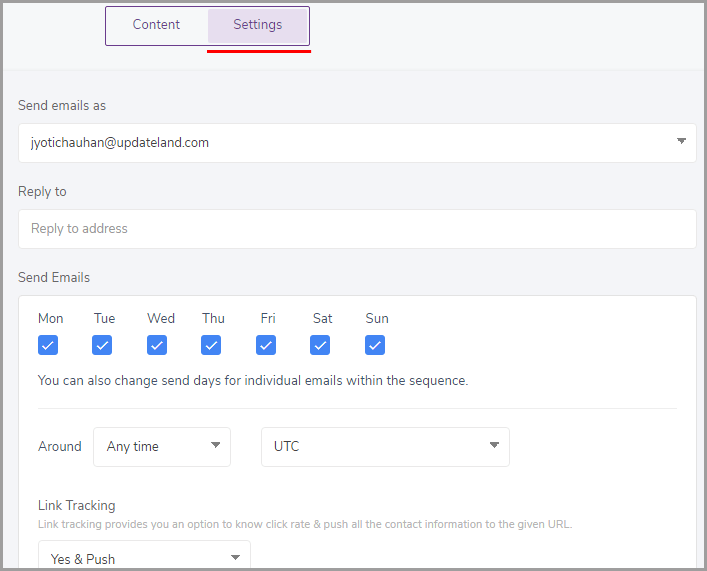
You can also customize advanced settings for your sequence. Click on the “Settings” tab on your sequence page.
You can:
- Set a reply address.
- Choose specific days for the emails to be sent.
- Set specific time for the mails to be sent.
- Enable/disable link tracking
- Or even exclude contacts from your sequence.
EngageBay tutorial: Automation
What’s the use of 21st century if you have to do everything manually, right? No flying cars yet, however, EngageBay does allow advanced automation to take some workload off your hands.
Just go to Campaigns (top-bar) > automation > create automation.
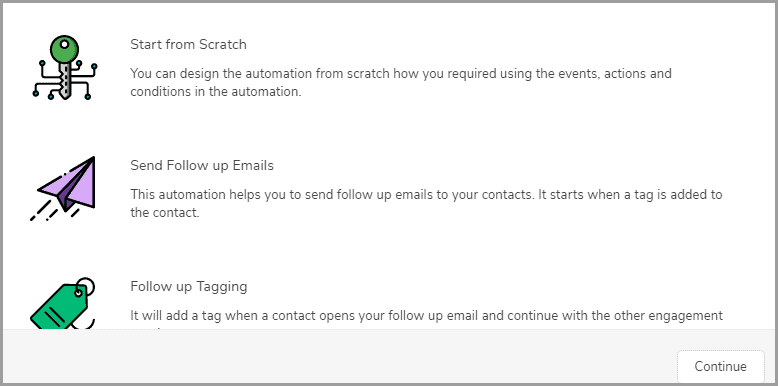
You’ll get 5 automation scenarios to work on. You can also start completely from scratch.
For this EngageBay tutorial, we will “start from scratch”. Anything you can do here, can be done using the other 5 options.
So, I click on “Start from scratch” and then “create automation”.
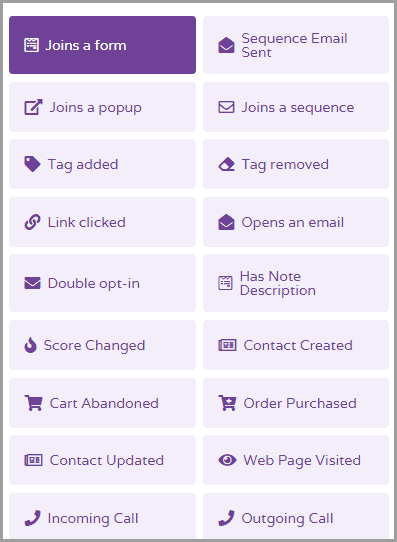
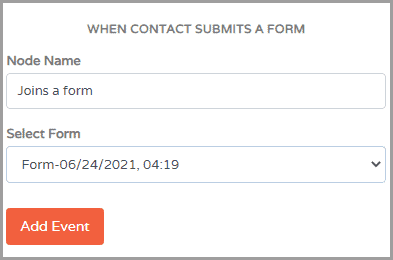
Now, I get to choose from 18 events. These are the triggers which would initiate my automation.
To keep things simple, let’s go with “Joins a form”. This will trigger my automation when a new user joins one of my forms.
On the same popup, I get to select the exact form I wish to automate. Do note that this setting will slightly vary based on the event you’re selecting. However, it’s always just as simple.
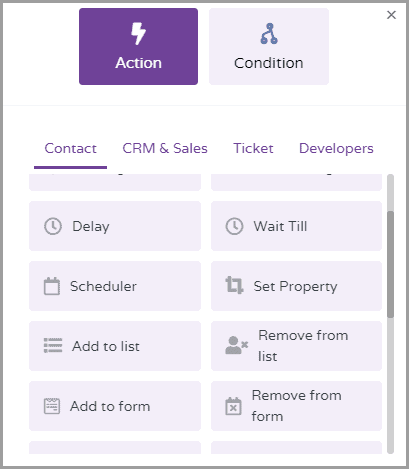
Anyway, once I’ve added the event to my automation, I get a workflow-like view. Now, let’s add an action (result, of what happens next). Click on the big plus (+) sign on the top-right.
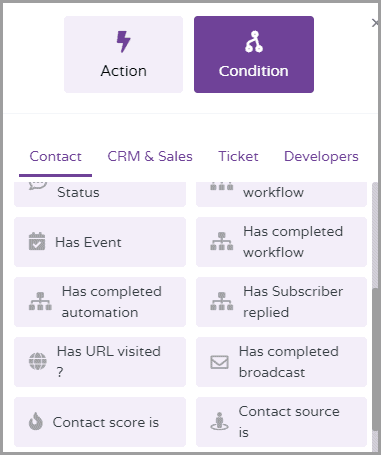
A new popup would be shown. You can either choose:
- An action: This action happens instantly as the previous event is triggered.
- Or, a condition: It checks if the user matches certain conditions. (g. I can put a condition to check if the user has visited updateland.com before redirecting them to the next action).
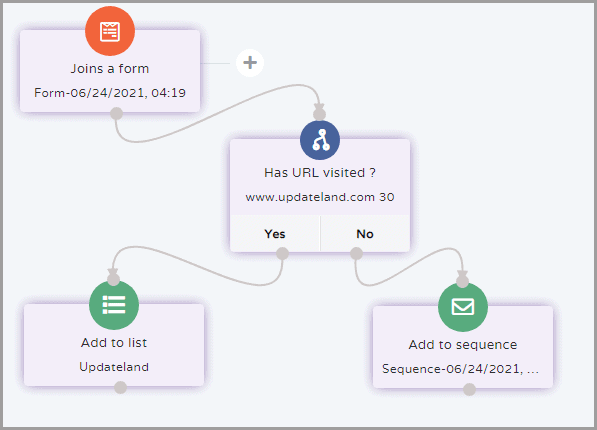
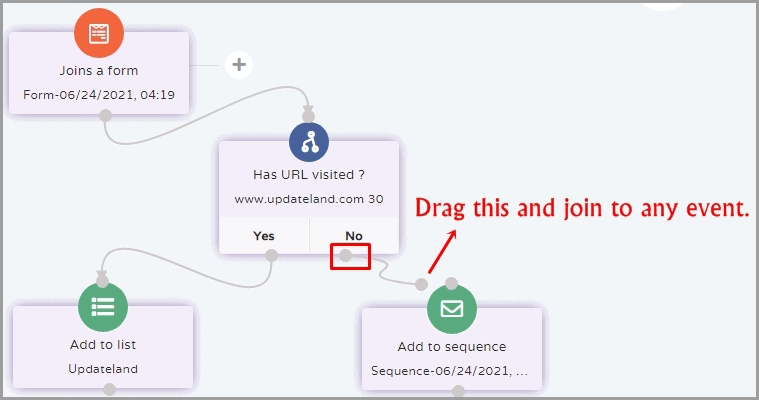
To explain things to you better, I created a full automation. The screenshot and the explanation below should help you understand better:
So, in the above automation when a user joins a form, I then check if they’ve visited my URL (www.updateland.com). If they have, they’re added to my list. If they haven’t, I add them to my email sequence (where I’ve already configured a funnel to make them visit my URL).
Tip: Once you create all your events + conditions + actions, drag those little grey dots and connect them in the sequence you want your automation to proceed. You can drag these tabs anywhere on the screen.
I’m personally happy with the user interface so far, are you?
Engagebay Sales modules
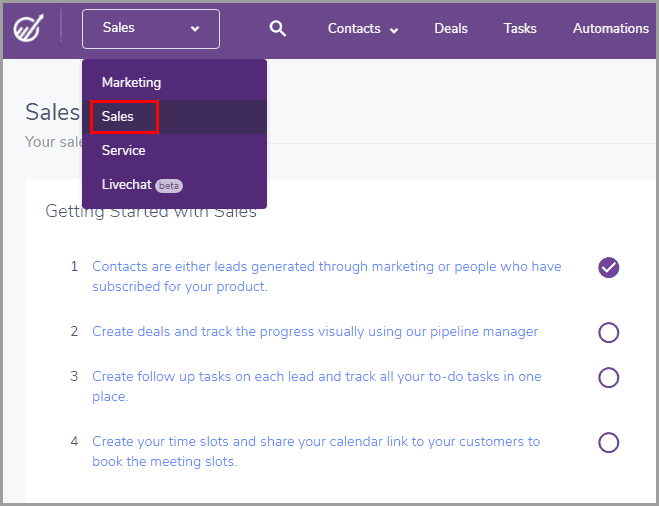
This is the second primary module that EngageBay offers. It too offers an identical interface like Marketing, complete with the automated task list for you.
Let’s get started then?
How to create deals using EngageBay?
Deals let you create a complete workflow of a customer. They begin as a new visitor, and hopefully you take them to the final stage of winning them as a customer.
Creating deals also helps you with your automation and workflows. You can use these deals as actions in your automation. E.g. pitch a deal to a user who joins your form!
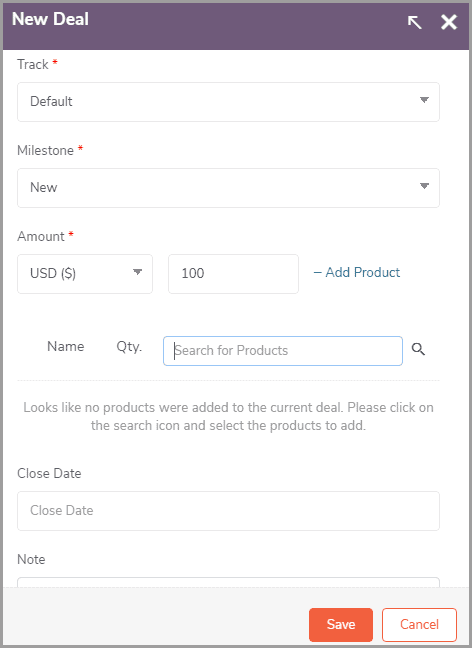
Anyway, you need to go to “Deals” > “create new” to initiate the process.
A slider would appear from the right. Enter the deal name, price, description etc. and click save.
Adding products to deals
When creating a deal, you’re asked to enter a product. Click save even if you don’t have a product yet.
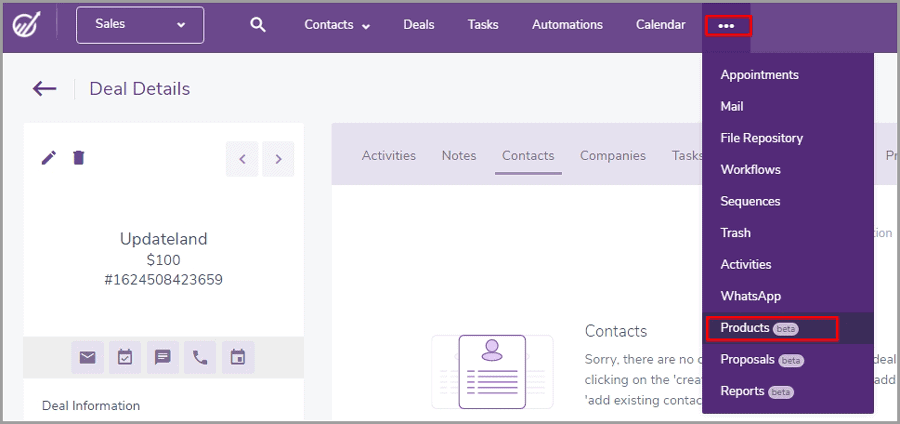
You can add products by clicking on the three horizontal dots on the top-bar > products.
Then simply click “Add new product”.
A form is displayed. You can fill this with:
- Product name
- Actual price
- Discount %
- Currency
- And a deal image.
Done.
Creating proposals using EngageBay
You may have the best products, without the right proposals, they probably won’t sell. Let’s create one then?
Click on those three horizontal dots on the top bar and then “Proposals”> create proposals.
On the next page, either choose a template, or start designing your own. I’ll go with the pre-made template for now.
(This feature is still in its Beta phase, more templates would be added once it’s finally released).
It’s just as easy as designing a landing page! Completely drag & drop or requires a few clicks at best!
Once you’re done, click save> enter a name for your proposal! Done.
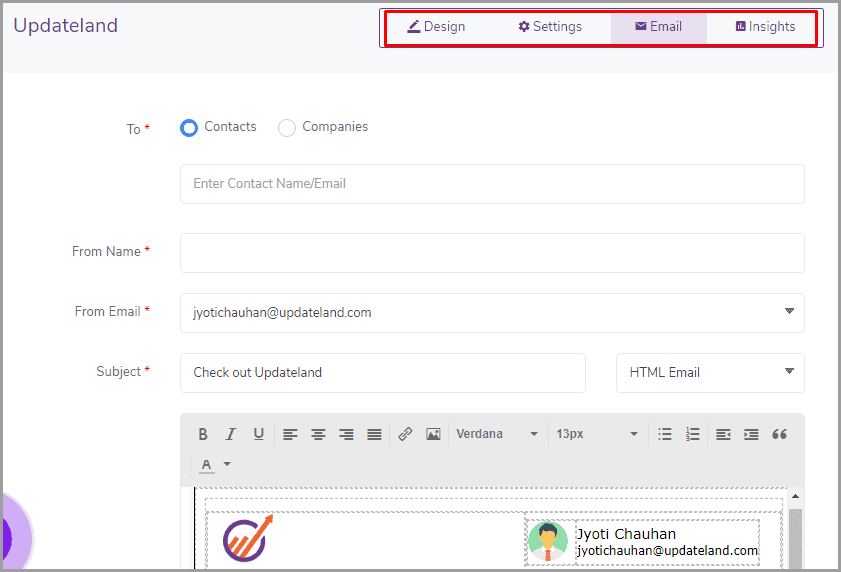
You can go to the “Settings” tab to add a greeting for your proposal. The E-mail tab lets you craft a personalized email to announce your proposal to your contacts.
Detailed “insights” too can be found. These will show you no. of email opens, views, and engagement on the proposal.
Bottomline? You don’t just “create” your proposal, you also share, market and monitor it right from this dashboard.
Creating tasks using EngageBay
This is EngageBay’s “todo list”. I use a number of list makers and other similar tools. With EngageBay it just is more streamlined and organized.
Go to “Tasks” (top-bar) and click on “create tasks”. It’s the exact same UI as creating deals so let’s skip the screenshots?
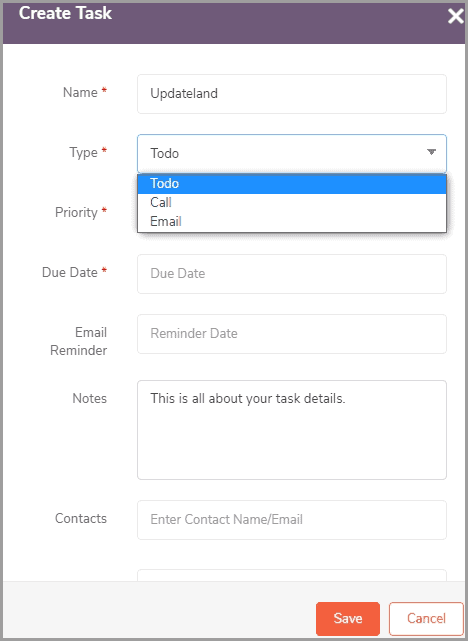
Now, you can either create a “Todo”, a “call task” or an “email”.
You can do the following with tasks on EngageBay:
- Set email reminders
- Assign status (started/in progress/waiting etc.)
- Assign deals for context
- Set priorities
- And obviously, set a due date.
Now, this isn’t a feature that I’ve never seen before or outright impresses me. However, the fact that it’s available here does make things a lot easier.
How to create Appointment Scheduler using EngageBay?
Regardless of what business you own, appointments are a part of your life, aren’t they? With the current COVID-19 situation, they may be held digitally but they’re held nonetheless.
Imagine having an automated interface using which anyone can schedule appointments with you! That’s possible using EngageBay.
Just go to “Appointments” in the sales module (click on the three horizontal dots on the top-bar).
Then go to “slots”. This will let you assign slots most favourable to you.
You can easily edit existing slots by clicking on the “edit” option as shown in the screenshot above. New slots too can be created by clicking on the “create new” button.
The “Preferences” tab (just below “slots) offers many other options. You can:
- Set business hours
- Customize the form to acquire data you need.
- Add logos
- Set a success message.
- Set reminders to the user at a pre-specified time.
- Send invitation emails and a lot more!
Doing any of the above-mentioned things is extremely easy. You only need to edit text, or upload photos.
How to use EngageBay livechat module?
This lets you create a live-chat widget for your website/landing page or any other campaign. Simple, right?
You can provide support, or approach visitors upfront with your products and services.
To create a live-chat widget, go to the “Livechat” module and click on “chat widget” (top-bar).
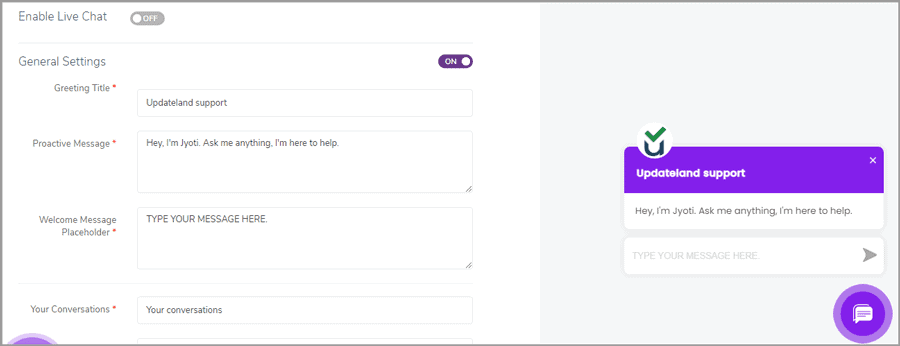
Then simply edit the text on the left-sidebar. It even displays a live-preview of how it’ll appear to your users!
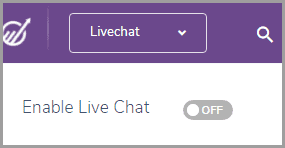
Once you’re done with the changes, simply toggle the “Enable Live Chat” button to on, can be found on the top-right.
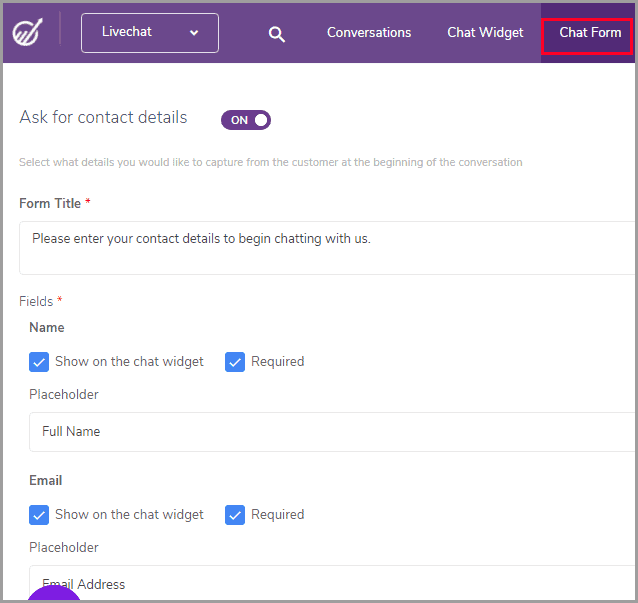
If you click on the “chat form” tab, you can customize the chat widget further. E.g. you can specify what details you want from a visitor, change the button text, add custom fields etc.
I doubt any of you reading this EngageBay tutorial find that hard, do you?
How to add chat shortcuts on EngageBay?
I personally am not a fan of shortcuts. Smart visitors may know that your agents are using shortcuts because these are exact same replies sent for generally expected questions.
However, EngageBay does let me create them and so I’ll include the steps for this EngageBay tutorial. Also, these are really helpful for those who receive huge traffic or just repetitive questions.
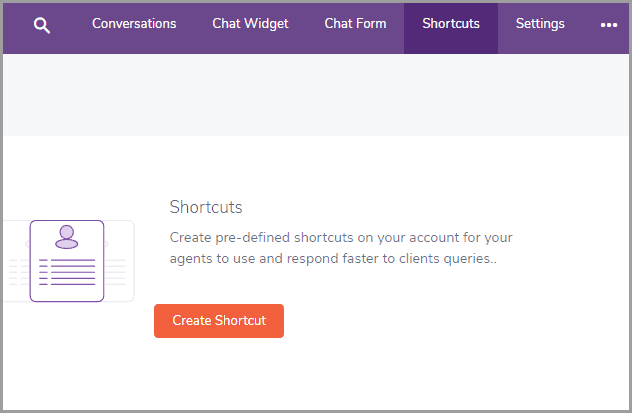
Just go to the Livechat module, then click “Shortcuts> create shortcut”.
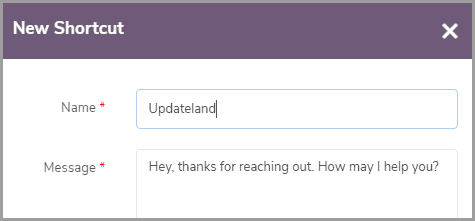
A slider appears from the right. Simply enter a name for your shortcut (it’s best if you keep this as small as possible). The “message” is what gets delivered to the users seeking a reply.
Done! Your agents can now use (/{shortcut name}) to use these shortcuts. (You can also change the shortcut key , the default is set to [/]).
You did get a pretty decent idea of how to use EngageBay so far, didn’t you?
EngageBay Tutorial- Final words
This EngageBay tutorial may seem pretty long, but it’s still just about 50% of the tool’s true potential.
There’s so much more it offers. It’s just that those features are extremely simple and straight-forward and hence a “tutorial” wasn’t necessary for them.
I’d urge you to check my EngageBay review out for a detailed explanation of every single feature the tool offers.
For now, I’ll just say that even without this tutorial on EngageBay, you can figure out almost everything on your own. They’re truly kept things simple, very.
