DocHipo review: Is it the best, forever free drag & drop online graphic designing tool? That’s a question I’ll attempt to answer throughout this piece.
If you’re someone who needs a new design for an ad, business card, logo, startup or anything else, keep reading. Yes, even if your computer & designing skills are 0. Chances are, you’ll be designing your own assets without hiring a designer in the next few minutes.
Hey, the tool is forever free and only requires an email for signing up. This proves that I’m not trying to “sell” DocHipo here. It’s free by default!
Let’s see if it’s any good then.
Table of Contents
- DocHipo Review: What is DocHipo?
- User-Interface
- Hundreds of pre-designed templates
- Half a dozen widgets and modules
- 1-click background remover
- Drag & drop editor
- Share documents with custom permissions for each user
- Real-time collaborations
- Royalty-free images from Pexels + Unsplash
- Advanced Image editing options
- Other editing features I find useful
- Versioning
- Multiple file types and quality options available
- Publish (host), password and embed in a single click
- DocHipo pricing: Free forever
- DocHipo support
- Final verdict: Is it the best drag & drop graphic design software?
DocHipo Review: What is DocHipo?
Short answer? A forever free, drag & drop online graphic design tool.
The long answer? It’s a tool that lets you design, share, collaborate and even publish designs in a few minutes, with absolutely 0 previous experience or skills required.
Here are its primary features:
- Website: https://www.dochipo.com/
- Forever free (no card required)
- Pre-designed templates
- Dozens of widgets
- Completely drag & drop
- Advanced and secure sharing/ real-time collab features
- In-built stock image search (Pexels and Unsplash)
- Versioning
- Publish and embed directly off DocHipo
If those features even remotely seem of interest, this DocHipo review is for you.
User-Interface
Let’s say you’ve never designed a single piece of graphic, ever! Can you use DocHipo?
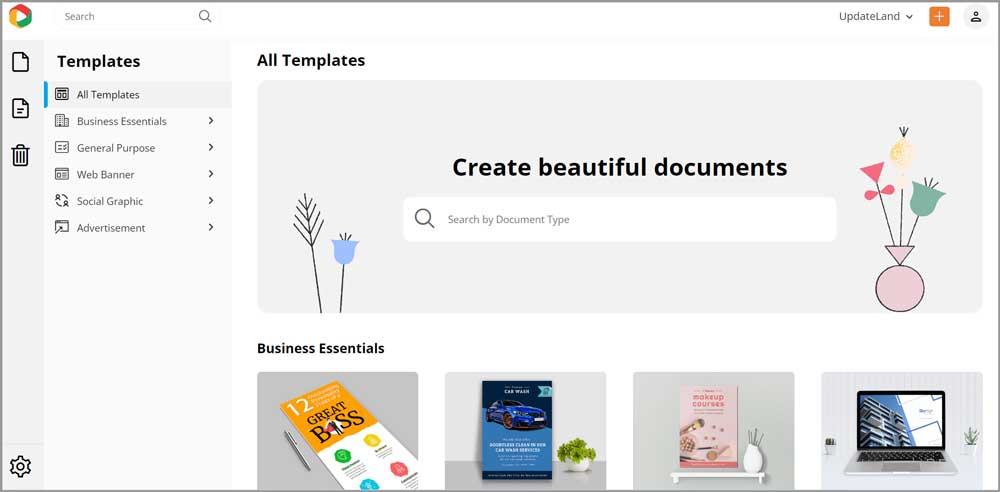
In my opinion, yes. Allow me to explain why I say so. This is the primary dashboard you see when you login:
Doesn’t this look extremely simple and self-explanatory.
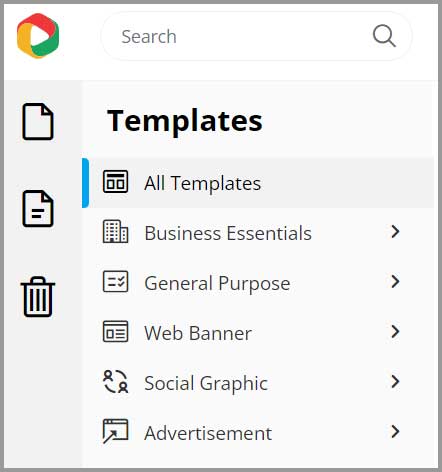
On the left, you can see the “Templates” section. It basically lists all the different types of templates you can create using DocHipo. (I’ve discussed all the possibilities later in this DocHipo review).
Towards the centre, you can easily spot the “search” bar. You can simply type what you wish to create (Book cover) and it shows you the available templates.
In simpler words, I doubt any “special skill” is required to use DocHipo. Don’t you agree?
Hundreds of pre-designed templates
With DocHipo, you do not need to start from scratch. It has hundreds of pre-designed templates for nearly every purpose out there.
You can literally pick the exact thing you’re trying to create and you’ll get access to all the available designs.
There’s no limit to what you can create. Infographics, flyers, posters, business cards, calendars, logos, social media posts, brochures, ad-copies are just some of the possibilities.
Half a dozen widgets and modules
Widgets/modules are basically elements you can insert on your designs. The text, images, borders etc. These are what make up the design.
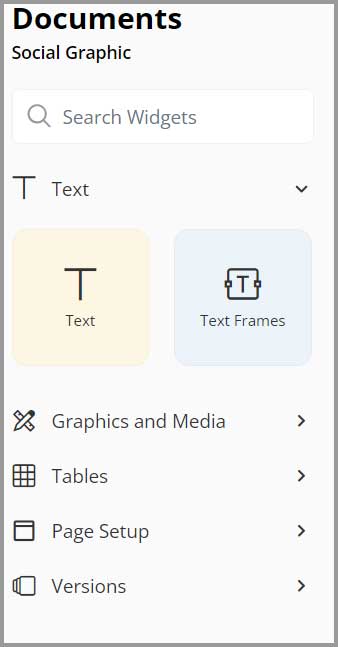
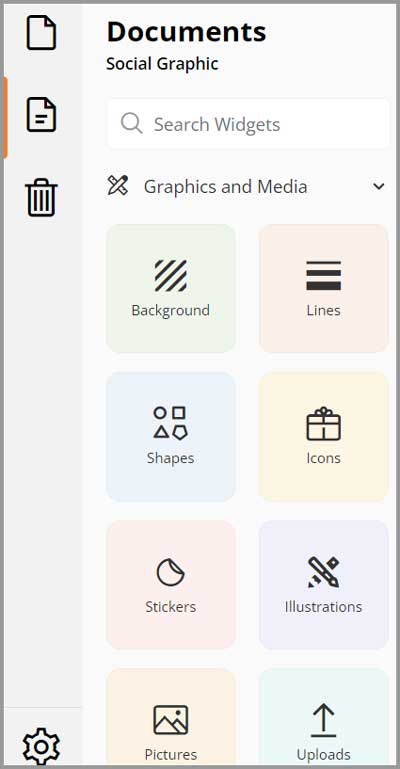
DocHipo has 4 primary modules:
- Text
- Graphics & media
- Tables
- Page setups
Let’s discuss these in detail?
Text widgets
The “text is the first widget you’ll find. It has two sub-widgets.
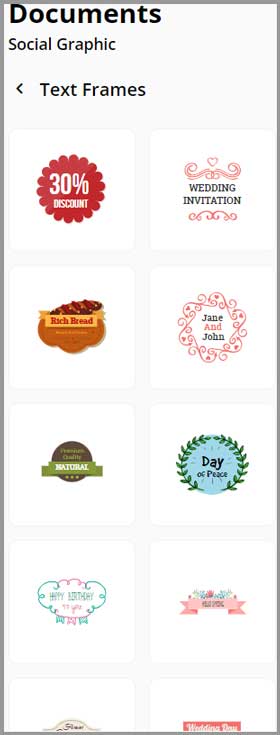
You can use it to insert normal “text”, as well as “Text frames”. The latter is basically editable text that’s designed as a graphic.
Graphics & Media widgets
This is one of my favourite widgets. You can insert dozens of different types of creative graphics on whatever you’re creating.
Some of the available options include:
Background: It basically sets the primary theme colour for your creation. You can insert solid colours, gradients or even patterns.
Lines: Of course dozens of different shapes and types of lines, arrows, pointers can be found here.
Shapes: You can find 2D and 3D shapes here such as arrows, cross sign (X), stars, hearts etc.
Icons: Yes, Dochipo has a library of royalty-free icons you can use. There’s a very friendly search-bar you can use to find the exact icons you’re looking for.,
Stickers: Yes, it got those too.
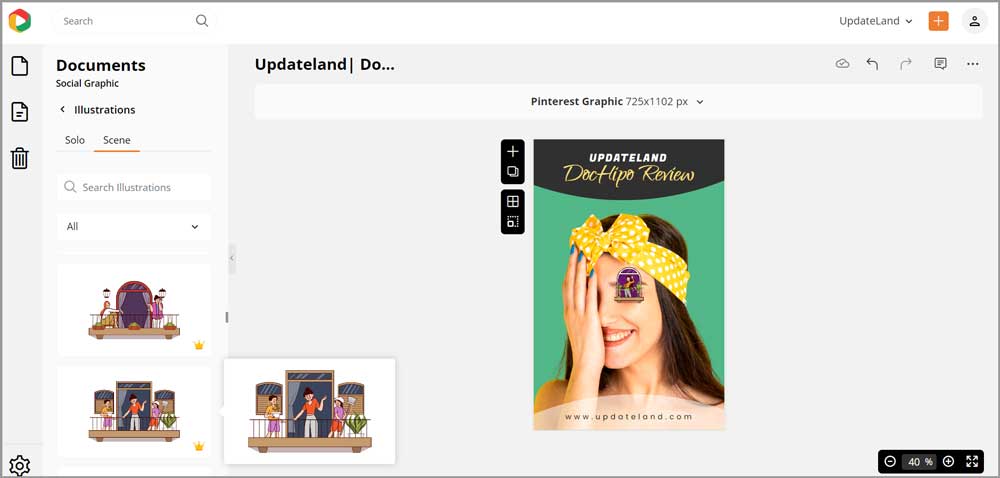
Illustrations: Incase icons and stickers weren’t enough, you can also insert illustrations. These are figurines and images that can be used to explain different activities, scenarios and environments better. You can even choose between “solo” (like an individual walking) or “scene” (stickers with a bit more story to them) stickers.
Pictures & videos: You can choose to insert from a collection of thousands of photos on DocHipo or of course upload your own. The same goes for videos as well.
Animations: In case you’re making a GIF banner, or anything that needs animations, DocHipo got you covered. It has hundreds of animations that you can insert with a single click.
QR Codes: Okay, this is something I wasn’t expecting. DocHipo lets you instantly create and insert QR codes onto your design. Simply enter the URL or text you want the QR code for! You can even customise the colour and margins for the QR code.
Tables
I doubt this widget even needs an explanation. Yes, you can use this to insert different tables to your design. Of course complete customization for the body colour, border, text fonts etc. is possible.
Page setup
This isn’t exactly a “widget” and rather a setting. You can use it to set the margins, page size and page transition for your design.
1-click background remover
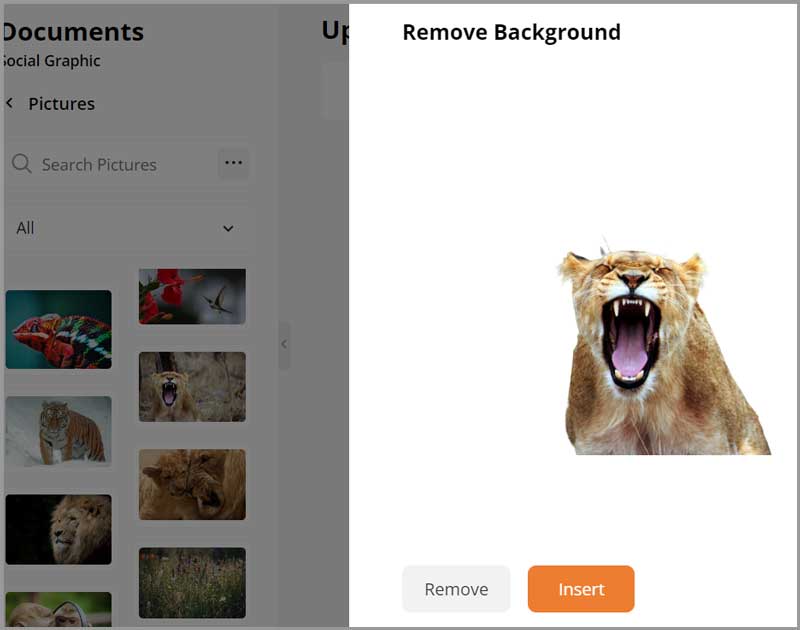
This is one of those features that’s extremely helpful on any designing tool but is often missed. Fortunately, that’s not the case with DocHipo.
DocHipo has this one-click ‘background remove’ option. Simply select an image and click the button. It automatically detects the foreground (yes even if it’s not a human. I’ve tried removing backgrounds from animals as well) and removes whatever is in the background.
The process takes less than a second and gives you images you can use anywhere, instantly.
Drag & drop editor
Let’s see how to actually “use” DocHipo? Is it really as easy as the company claims?
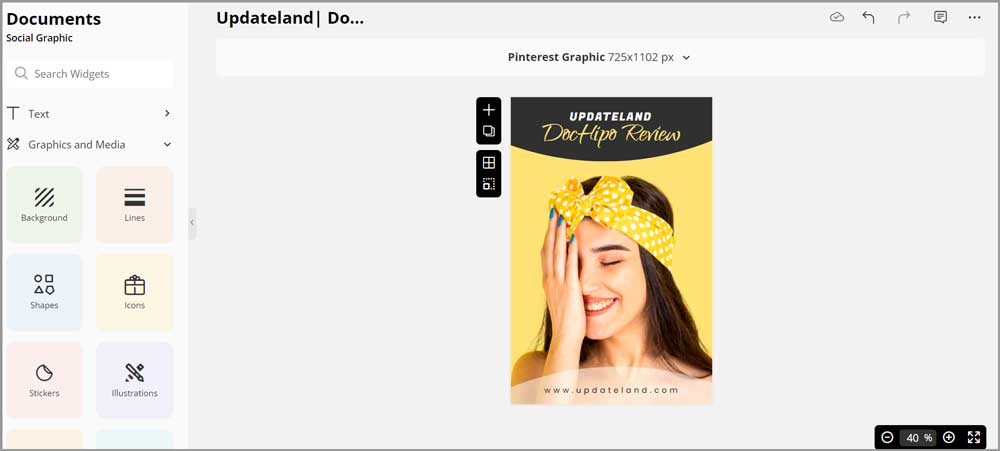
The editor is 100% drag & drop. All we need to do is, drag the widget we need from the left-sidebar and drop it on the design.
Once done, we get to edit the widget to your liking.
Even if this is your first time doing this, I’m sure you can get things done, can’t you?
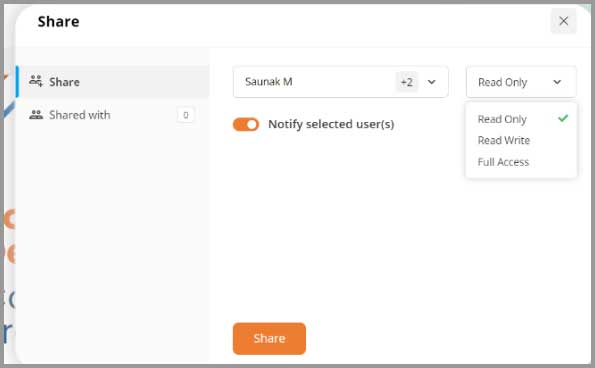
It’s possible you’re a startup or a group. In any case, DocHipo does have impressive sharing options. It lets you share your creations with specific people, and control how much access each individual gets.
There are three primary options:
- Read only: The viewer can only view the document but not make changes to it.
- Read write: The viewer can both view the document as well as make changes to it.
- And Full access: The viewer can do everything that you (the creator) can do.
Real-time collaborations
I’m sure most of you have seen the Google Doc collaboration feature. All your friends/colleagues can work on the same documents and you see a pointer that shows exactly where the other members are working on the document.
Well, the exact feature is also available with DocHipo. Everyone you share the document with can work on the document at the same time.
Royalty-free images from Pexels + Unsplash
For any design, you of course would need stock assets. Sure you can go hunting for those manually. Or, you could just use the in-built search panel on DocHipo.
It fetches royalty-free images from Pexels and Unsplash, two of the best sources for stock images.
No special steps required either. You simply go to the “pictures” widget and search for what you want.
Advanced Image editing options
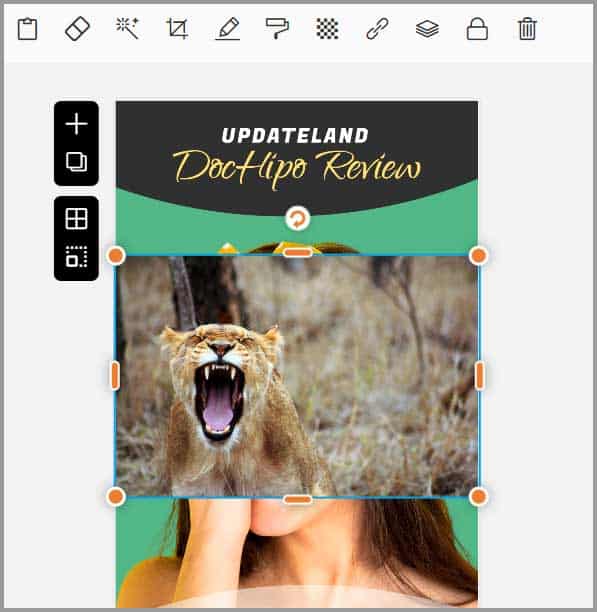
Once you upload/insert an image, a tool-bar appears. It lets you do a lot with your images, some of these options are:
Filters: You can choose from dozens of filters to add to your image.
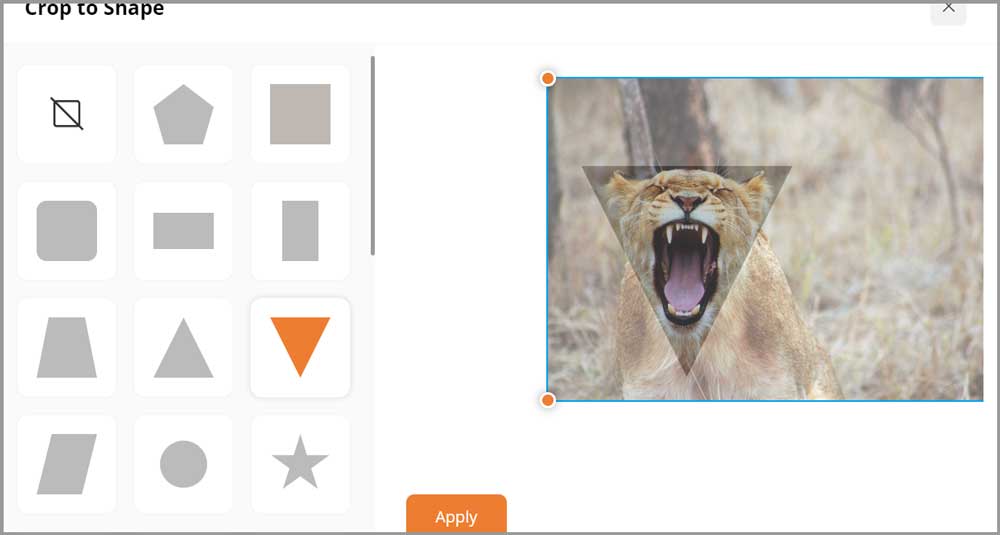
Crop to shape: It’s one of my favourites. You can crop your images using specific shapes. Adds a touch of professionalism and elegance to your images.
Copy style: At times, we spend quite a bit of time adding effects to an image.This feature lets us copy the styles we’ve added and change the image. The new image retains all the styles/effects added to the previous image.
Opacity: I’m sure this is self-explanatory, isn’t it?
Link: You can add clickable links/emails to your elements.
Other editing features I find useful
On top of the features we’ve discussed so far, DocHipo has a ton of other features which make designing simpler.
- Layering: This allows us to send elements to the front or back of other designs. Extremely helpful when creating an “overlap” effect.
- Rotation: Of course you can rotate images the way you want.
- Borders and shadows: Yes, you can apply both shadows as well as borders to elements.
It’s still just the tip of the iceberg. A lot more is possible which I’m sure you’ll discover on your own.
Versioning
Like everything else we humans do, it’s very possible that we make mistakes with our designs. Fortunately, DocHipo allows “versioning” .
It basically stores your edits every hour. It’s also saved as soon as you leave the editor. This makes you always have your most recent changes, as well as previous changes in case you need them.
Multiple file types and quality options available
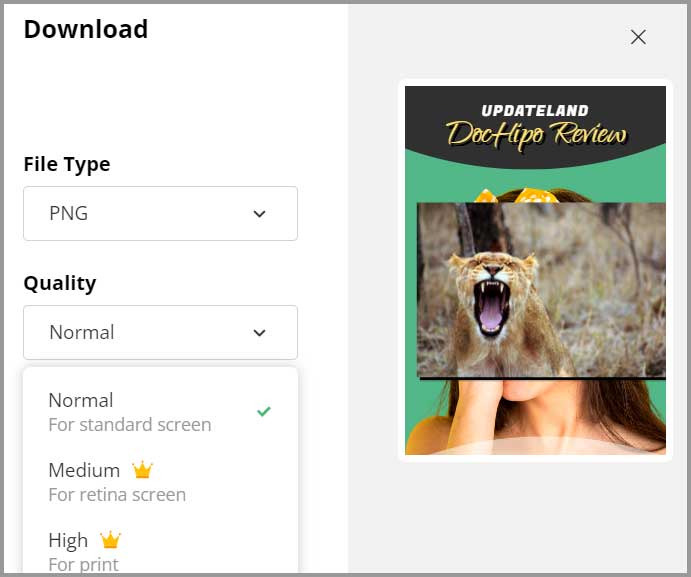
DocHipo went all out when it came to “downloads”.
You get to choose not just your format, but also the quality.
The available formats include:
- JPG
- PNG
- Transparent PNG (yes, you can download this separately)
- And PDF.
Similarly, for the quality, you get to choose from:
- Normal
- Medium
- And High.
Publish (host), password and embed in a single click
You can share your design with the world in a second, instantly. You don’t have to download/upload or host it anywhere.
There’s the “publish” button. It instantly generates a link you can share with anyone.
Moreover, you can even set a password. If you do that, an additional password will be required to access your design.
Finally there’s even an embed option. You get a code that you can implement on your website and many other places. Any changes made to your design on DocHipo gets automatically reflected and synced with your embedded design as well.
DocHipo pricing: Free forever
I guess it’s time to address the Elephant in the room? How much does DocHipo cost?
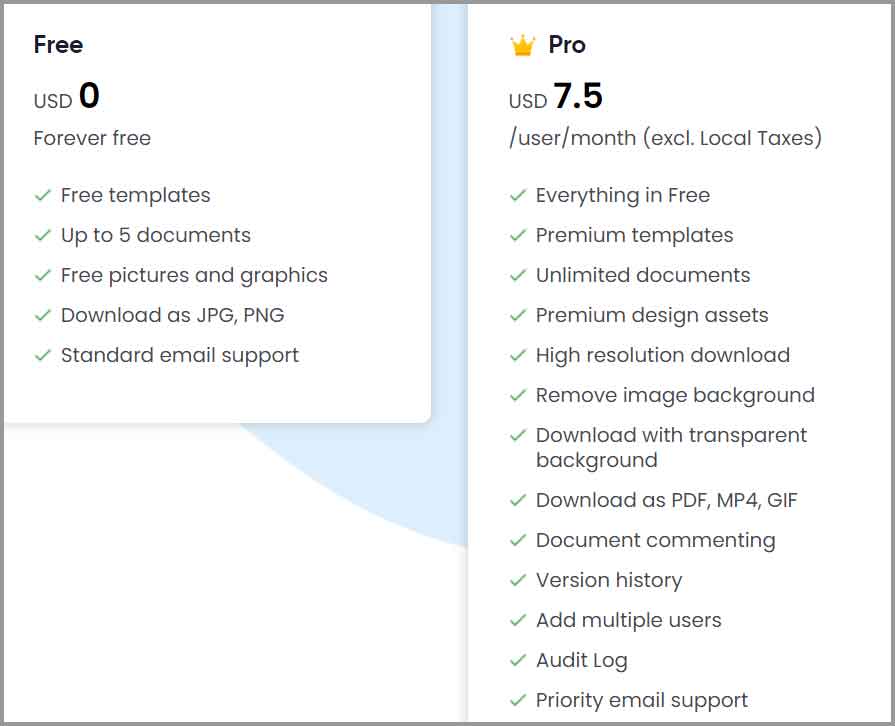
It’s free! Yes, it costs $0.00 to start using DocHipo. What I mean is, there’s a plan that offers nearly all the primary features and doesn’t cost a cent. You don’t even need to link a credit card or any other such information. All you need is an e-mail ID.
The “Pro” version is 100% optional. You only need to upgrade if you wish to. It offers all the DocHipo features and costs just $7.5/month.
DocHipo support
Before I sign off this DocHipo review, let’s discuss its support in brief.
So, the company has a live-chat on the website. Yes, it’s available to everyone, even non-registered users.
From my experience, it’s always online. The response time is more than impressive and I’ve always received replies within a few minutes at best.
Of course, you can also contact them over e-mail.
Final verdict: Is it the best drag & drop graphic design software?
So, time for my personal opinion. I do love DocHipo. Why wouldn’t I? It’s extremely easy to use, offers hundreds of pre-designed templates, requires 0 special skills, has integrated Pexels and Unsplash search and so much more.
The collaboration feature, sharing options, versioning, control over quality & format are some other green signals.
Is it “the best” though? Well, that would be a tall claim to make (and a controversial one). However, in my opinion, if you need an easy to use, feature-rich, online drag & drop, 100% & forever free graphic design app, DocHipo is worth a glance.
